Tuesday, May 24, 2011

Peanut Butter Cups

I can think of a million uses for "Reese's" peanut butter cups.   One of them?  Crushed in ice cream!!  (Who hasn't gotten a Reese's Blizzard from Dairy Queen at least ONCE in their life?). I have many fond memories of my grandmother who LOVED eating them (not to mention a number of other very close relatives and family friends).

I have been thinking about making these for so long and now I'm really not sure why it took me so long to actually do it!  They're SO simple to make, very tasty, and easy for getting little kids involved.  :)

Why not make your own "Reese's" Peant Butter Cups and toss them on some vanilla ice cream, or just to have as a simple dessert?  Make these as minis to pack in school lunches or to make "thumb print" cookies with!  I'm pretty sure the options are endless!

Peanut Butter Cups
1 bag chocolate chips (use your favorite kind!)
peanut butter (I like to use natural with no-added sugar, but use what you have or prefer to eat!)

Line a muffin tin with 12 paper liners.  In two bowls, divide the chocolate chips into 1/4 of the bag in one bowl and 3/4 of the chocolate chips in the other.  In the microwave, melt the smaller bowl of chocolate chips (just a tip for melting chocolate in the microwave - do it in slow increments, about 30 seconds, then in 15 second segments, mixing the chocolate each time so you don't over melt them and burn the chocolate - it really doesn't taste good if you do!!!).

Pour the chocolate evenly into the bottom of each cupcake liner, just covering the bottoms of each so there is a thick enough later at the bottom.  Allow to harden (you may want to put it in the fridge to harden - this will take about 15 minutes).

Next, spoon about 1 tbs of peanut butter in the center of each cupcake liner, trying your best to leave a little bit of an edge for the chocolate to spill over (to create a sort of "seal").  You may decide that you want even more, so I'll leave that up to you!

Lastly, melt the second bowl of chocolate (the larger one).  Once melted, pour the chocolate over each blob of peanut butter so all the peanut butter is covered.  Allow the chocolate to hard and serve!


Beware!  If you use natural peanut butter, you might want to have a napkin on hand (or a spare sink... it gets really messy, but totally worth the chocolate-peanut "butteryness" that covers everything!)

Saturday, May 21, 2011

Chicken Fajita Bean Dip

Bear with me right now!  SOMETIMES looks are deceiving.  I know this may not be the most elegant meal I have posted, or that you have ever seen, but I promise you that we enjoyed it and that I don't want to post something I was disappointed in the flavor of in the end.

Slowly, little by little... we're getting through all the food in the kitchen that needs to be eaten before we head out of here!  Items used tonight?  Chicken, onion, peppers, tomatoes, refried beans, salsa, and sour cream (granted the sour cream WAS something I had purchased with this dish in mind).

When I see a can of refried beans, I often first think... 'Hmmm... I wonder if that's a "vegetarian" can, because if not...  I know there's lard in there as a stabilizer!"  If I have purchased the can myself, then I know that it's "lard free" and my worries are gone!  :)  Second on the list of things I think about?  Bean dip!!!  Just this past week when we had the chance to FINALLY hangout with the other student quartet at UT, we had a feast in which everyone brought something to snack on.  Someone read my mind!  BEAN DIP!!!  Well, did QUITE read my mind, as we didn't bring duplicate dishes.  However, I had been looking through the cupboards and thought of bean dip when I saw the can.  I was quite glad, though, that Willie and Sarah did bring it, because it's always a hit!

Tonight?  This "glorified" bean dip.  Honestly, I forgot how much I LOVE throwing something into the oven and "forgetting" about.  Although tonight had a lot of other aspects involved, it somehow didn't create as many dishes as I feel I usually make, and putting something into the oven somehow made me feel SO much better!  :)  Just a reminder for myself for when school starts again in the Fall!

Chicken Fajita Bean Dip
1 can refried beans
2 chicken breasts
1 onion
3 peppers (used one each of red, orange, and yellow)
4 - 6 tbs oil
salt & pepper
garlic powder
cumin
chili powder
2 small lemons (or 1 large)
salsa
sour cream
pepperjack cheese (grated)
fresh diced tomatoes
tortilla chips or fresh tortilla wraps

Preheat oven to 350.

Place chicken breasts in an oven-proof pan.  Season with salt, pepper, and garlic powder.  Squeeze fresh lemon juice over chicken breasts.  If you desire, toss the lemon rinds into the pan to roast while the chicken cooks.  Bake for about 20-25 minutes.  Remove from oven and shred chicken into bit-sized pieces.  Season with desired amount of cumin and chili powder, stir, and continue to cook for another 5-10 minutes or until chicken is moist and cooked through (no one wants dry chicken!).

While the chicken is baking, heat a skillet with oil on medium-high heat.  Once heated, toss in onions and peppers, season with salt and pepper (as well as garlic and cumin if desired).  Cook down until tender and lightly browned.  Remove from heat.

In a large oven-proof glass or metal pan, spread the refried beans in an even layer on the bottom of the pan.  Next, spread an even layer of the onions and pepper, followed by the shredded chicken, and lastly by the grated pepperjack cheese.  Bake for 8-10 minutes or until cheese is melted.

Remove from oven and top with salsa and sour cream.  Want other toppings?  Look below for some other ideas!  Serve with chips as a dip or spoon into fresh, warm tortillas to make a "fajita burrito" style meal!


Other topping ideas?
fresh avocado or guacamole!
cheddar cheese
cilantro
roasted corn (silly me FORGOT to use the corn!)
salad greens (kind of like in a taco salad)

Tuesday, May 17, 2011

Creamy Asparagus Soup

So, I had grand plans for dinner tonight, only to be thwarted by this unusual headache...  Not to sure where it came from, but all that to say, I only got to part one of dinner tonight.  Despite that, it went over quite well I'd say!

Nicholas and I LOVE (probably should stress that more as...  LOOOOOOOOOOOOVE) asparagus!  If it's on sale, then it's going in the shopping cart.  Doesn't matter if we have anything on the menu or not that we need it for, we'll find a way to happily consume this green veggie.  :)  That scenario is exactly what happened last week!  It was such a great deal, in comparison to what it has been going for, that I decided we needed a bunch.  Sadly, life was SO hectic and crazy, although good!, we didn't have the chance to eat at home for three or four nights in a row and didn't get around to eating it.  So... there the asparagus sat... alone... in the fridge... waiting to be used.  It got to the point that I knew I needed to use it or toss it in the freezer to preserve it until the proper time presented itself.  A few nights ago I took an inventory of everything that we need to eat in the next few weeks (just a warning... that'll basically be EVERY recipe you see until June hits!).  Well... let's just say that asparagus was calling my name in addition to a few other ingredients.  The result - this creamy asparagus soup!  (The rest of the cream cheese needed to be used as well!).

Back in the BREATHTAKING land of Norway the evening meal following Nicholas' proposal, we  were patrons at probably the most upscale restaurant I will ever visit in my life - Emilies.  It was a little place - probably only seven or eight tables.  The menu?  That, my dear friend, was the chef's choice!  I tried a few things there that I probably would never eat, but am glad I had the opportunity.  One of the first courses of the six?  Creamy Asparagus Soup!  I think we almost thought we had died and gone to heaven (I mean, the evening had already been so overwhelming and wonderful!).  Although this is not an exact replica (and I must be honest that when looking for recipes, it was a Kraft recipe that inspired this one), I have to say that we both agree that it is VERY close to what we remember.  Skål!

Creamy Asparagus Soup
2 tbs butter
2 tbs olive oil
3 leeks
1 bunch asparagus
2 - 3 large cloves garlic (crushed)
2 cups chicken broth
1/2 cup milk
4 oz cream cheese
salt & pepper

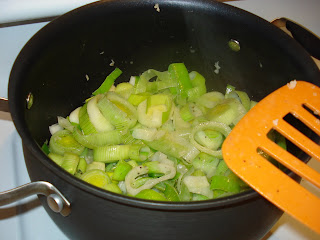
In a large skillet, or medium pot, melt butter on medium-high heat.  Add leeks, season with salt and pepper, and garlic, and cook down.  After about 5-7 minutes, add in the asparagus with the olive oil, seasoning with a little more salt and pepper, and cook down for another 5-6 minutes, or until asparagus is tender.

Add in chicken broth to veggies and allow to heat.  Once heated, remove from stove-top and pour into a food processor or blender.  Blend on high for about a minute.  Turn off, add in milk and cream cheese and blend until the soup becomes creamy and thick (you don't want any vegetable chunks remaining).

Pour into bowls and add a dollop of sour cream on top if you'd like!  This would be delicious with a nice bread to dip in and a great starter to a light pasta or chicken dish!  (At least in my mind!).

Sunday, May 15, 2011

Caramelized Peach Coffee Cake

Life has been crazy, busy lately!  Can't believe that in two weeks we'll be hittin' the road and movin' out of this place!  Time has just FLOWN by this year...  Where did it go and why did I not get to do everything I wanted to?

Out of town again...  Anna and I were rooting on the boys this morning while whipping this tasty "cake" up (with the addition of Grace and Christina who were here hanging out with us and joining in on the fun).  It's time to raid all the kitchen cabinets, the freezer, the fridge... and just get everything used! 

Not too sugary and sweet, and made with some whole wheat flour, this breakfast "cake" is a great start to any day.  Try it with some fresh peaches and bring in the summer!

Caramelized Peach Coffee Cake
caramelized peach slices
   1 peach (sliced)
   1 - 2 tbs butter (for caramelizing the peach slices)
   1 tbs cinnamon (for dusting
   1 - 2 tbs brown sugar

In a sauce pan, melt the butter (start with less and add more if you need to).  On medium-high heat, place peach slices down in melted butter.  Sprinkle with cinnamon and brown sugar.  Allow both sides to caramelize (about 5-6 minutes per side or until lightly browned).  Remove from heat and let set until batter is made.

batter
   1/2 cup butter
   1/4 cup brown sugar
   2 eggs
   1/2 cup ricotta (or sour cream if you'd prefer)
   1/2 cup buttermilk
   1 cup whole wheat flour
   1/2 cup white flour
   1 1/2 tsp baking powder
   1/2 tsp baking soda
   1/2 tsp salt
   1/2 tsp cinnamon (more if you'd like)

Preheat oven to 350.

Cream butter and sugar together until light and fluffy.  Add eggs and vanilla and mix again until incorporated.  In another bowl, mix both flours, baking powder, baking soda, salt, and cinnamon together.  Add the dry ingredients into the butter mixture, along with the ricotta and buttermilk, and stir just until mixed together.

Butter and flour one 8" or 9" cake pan.  Layer the bottom of the cake pan with the caramelized peaches (dusting with a little extra brown sugar if you desire).  Pour batter over peaches and bake for 20-25 minutes or until a toothpick comes out with a few crumbs.

Let cool for about 10 minutes before turning out onto a plate.  Serve!

Friday, May 13, 2011

Lime Chicken Cilantro Salad

Now, if you're not a cilantro lover, don't stop reading now!  The cilantro is in the homemade dressing, so you could also substitute another if you'd like.  :)

Now this salad is 100% inspired by my mother's and my mutual obsession with Nordstrom.  Yes, you might be confused, understandably.  I know, I know - you're thinking that Nordstrom is a clothing store, and well, you're right!  That hasn't changed.  But in case you didn't know, many Nordstroms have a cafe/restaurant attached.  When my mom and I are out on a shopping expedition and it's around lunch time, we always "accidentally" end-up eating there.  ;)  Every time (with maybe the exception of once...) I get this salad.  It's just THAT good!  Sadly, when they revamped their menu after the remodeling of the store in our area, they also changed the salad...  Now I guess I just have to make it for myself!

Serve this up with some nice bread and you've got a complete meal!

Lime Chicken
2 chicken breasts
3-4 cloves garlic (minced)
1 - 2 limes
zest of 1 or 2 limes
3 - 4 olive oil (more if needed)
salt & pepper

Preheat a skillet with the olive oil on medium or medium-high heat.

Cut the chicken into about 1/2" slices.  Season with salt and pepper and toss into the skillet.  Stir and add in garlic.  After about a minute, add in the zest and lime juice and stir again.  Cook until tender and cooked through (lightly browning).

Lime Cilantro Dressing
2 bunches cilantro (reserving a little for the salad if you'd like)
zest of 2 limes
juice of 3 limes
4 -5 cloves garlic
2 tbs sugar
1 tsp salt
1/4 cup olive oil
3 - 4 tbs water

Toss all of the ingredients into a blender and blend until smooth!

Lime Chicken Cilantro Salad (here are some good ideas of things to add!)

mixed greens or lettuce
tomatoes
corn (great if freshly roasted on a grill or roasted on high in a skillet)
avocado
cilantro
sunflower seeds
grated pepper jack cheese
fresh lime wedge

Plate everything together with the chicken and dressing and serve!

Wednesday, May 11, 2011

Cinnamon Rolls with Cream Cheese Frosting

Generally I don't get a negative reaction when I say the words "cinnamon rolls" around people.  Today was no exception.  :)

I have decided that for the last three Wednesdays of teaching, I will be bringing my students goodies.  I have some ideas for next week and the following week, so we'll see if those materialize, but today was Cinnamon Roll Day!

There's something so wonderful about a homemade cinnamon roll.  They're so different than store bought, and really, in my opinion, they can't be beat!  (Maybe I'm biased?)  I decided to go with my "mini rolls" today for ease of preparation and portability, not to mention that the bigger they are, the messier they are - and with many small hands... well, let's just say that's less mess to deal with!  (And less sugar to detox from).

This 24 hour recipe of mine (adapted... well, evolved is probably better... from many a recipe hunt and trial and error) has proved to be a success so far.  I'm not planning on changing it anytime soon!  ;)  These ooey-gooey buns, with their buttery bottoms, are quite delectable.  Haha!

Cinnamon Rolls
1 package yeast
2-4 melted butter (for dough)
1/2 tsp salt
1 tbs sugar (for dough)
1 cup milk (110 degrees F)
4 tbs melted butter (for brushing the rolls)
cinnamon and sugar (for the filling)
flour

In a stand mixer, combine milk, sugar, yeast, and salt.  Allow to sit for 10-20 minutes to allow the yeast to react with the heated milk.  You'll see the nice little action it gets once it has had a good amount of time to react.  At this time, add in the melted butter and stir.  On a low - medium speed, begin adding flour.  You'll want to get the dough to a consistency that is slightly elastic, yet fully formed.  At this point, if you have a dough-hook, attach that and allow the dough to kneed on high for 10-15 minutes.  If you don't have that luxury, well... it's time to get those hands moving!  Kneed the dough for approximately 10-15 minutes (if you can make it that long!).

Set dough aside.  Cover, in a bowl, with a towel or plastic wrap and let sit in a warm, dry location (such as the oven).  Let sit at least 12 hours.

Once those first 12 hours have past, it's time to construct the rolls!  Lightly flour your work surface.  Take the dough and dust lightly with flour.  For regularly sized rolls, begin by rolling out the dough into a symmetrical piece about 12" tall (and as wide as neceesary).  If you desire thicker layers, roll the dough out to about 1/4" thick.  For mini rolls, roll about 12" tall as well (and as wide as necessary), but roll the dough so it is about 1/10" thick - nice and thin, yet thick enough to still roll!

Take the 4 tbs melted butter and brush (with a pastry brush if you have one), on the dough to create a nice layer of butter.  Make sure to butter ALL the way to the edges!  Cinnamon and sugar as desired.  :)

Now, begin to roll the dough so it forms a long, long roll (you're rolling the long side, not the 12" thick side!).  Cut into 1 to 1 1/2" rounds.  Place in buttered pans (I use glass, but metal would work as well - such as a cake pan), spacing slightly apart so they have room to expand.  Brush extra butter on top of the rolls.

Cover again and set aside for another 12 hours or so (overnight is good!).

Preheat oven to 350.  Bake for 15- 20 minutes, or until lightly golden brown for the mini rolls, and 20-25 minutes, or until lightly golden brown, for the regularly sized rolls.  (Your oven might vary greatly, but that's the tendency in ours.  Watch carefully, though.  NO ONE wants a burnt cinnamon roll!!)  :)

Frosting
8 oz cream cheese (room temp)
1 stick butter (room temp)
juice of one lemon
zest (optional)
1 tsp vanilla
powdered sugar

In a mixer, combine butter and cream cheese and blend until light and fluffy.  Add in lemon juice and vanilla (zest at this point as well if you desire) and mix for a few seconds.  Begin adding powdered sugar until desire texture and flavor is reached.  Pour over cinnamon rolls and enjoy!

Monday, May 9, 2011

Beef Samosas

There's a grocery store back home that my mommy and I ALWAYS go to when I'm home.  We love getting lunch there whenever we can.  It's one of those special things we do together - a mother/daughter thing!  :)  I have a few traditional things that I always get when we're there, one of them being the tomato, mozzarella, basil, and red onion paninis.  One of the others?  SAMOSAS!!!  I don't think I had even heard of a samosa until seeing them there.  Now... well, I'm addicted!  They're one of my favorites foods, and not too difficult to make (you just need to have some time!).

They come with a lime cilantro chutney at this place, and I have to say, my mom and I always ask for an extra chutney, just because we're SOOOO addicted to it!  I know that people are either cilantro lovers or cilantro haters, but really, you could make these with another chutney or just skip it!  They're like little meat pies (and can be made with potato instead of beef for a vegetarian or vegan option!).  This is a great option if you're looking for something different than your traditional fare.  Break out of your mold and expand your horizon-taste-buds!!  I don't think you'll be disappointed!

Beef Samosas
1 lb ground beef
1 large onion
1 1/2 - 2 cups frozen peas
3 tbs oil (you can omit the oil and use all butter if you'd like)
2 - 4 tbs butter (you could omit the butter and use all oil for the vegan option!)
3 - 4 cloves garlic (crushed)
1/2 tsp freshly grated ginger (or dried if you prefer)
salt & pepper
1 jalapeno (chopped) or 2 - 3 tsp chili powder
3 - 4 tbs garam masala (or more if you really like the flavor!  We use LOTS!)
1 tsp coriandor
1 - 2 tbs fresh chopped cilantro (optional)

Preheat oven to 350.  (Tip!  While the ingredients are cooking below in the skillet, begin making the dough!  The recipe for the dough is listed below.)

In a large skillet bring either the oil or a few tbs butter to a medium-high heat.  Once heated, toss in the onions, season with some salt and pepper and stir.  After about a minute or two, add in the garlic and the fresh ginger (and jalapeno at this time if you're not using chili powder) and stir.  Cook onions until tender.  Add in ground beef, reseason with salt and pepper.  Add a few tbs of butter, toss in the garam masala, coriandor, and chili powder.  Stir until well incorporated.  Once the beef has fully cooked, add in the peas and cilantro and bring heat down to low.  Simmer until peas are tender.


Take about a 1" ball of dough and roll-out thinly into an oval-like shape.  Place about 1 - 1 1/2 tbs of the samosa filling on one side of the oval.  Fold the other end of the dough over the filling to create a pouch.  Seal the sides by pressing firmly to create a seal.  Repeat this process until all of the filling has been used.

Bake for 10-15 minutes or until  

Samosa "pouch" dough
4 cups flour
1/3+ oil
1/3+ oil

In a bowl, combine all of the ingredients.  Mix until a nice dough forms (you might need to add extra liquid as the recipe indicates).

Cilantro Lime Chutney
1 large bunch cilantro
2 -3 cloves garlic
1/2 - 1 tbs fresh ginger
1 tbs sugar
zest of two limes
juice of 4 smallish limes
a dash of salt

Toss everything into a blender and blend until smooth!  If you end up really liking this sauce, you may need to double this recipe (like I do!!!).

Friday, May 6, 2011

Pan Seared Pot Roast with Roasted Veggies

Last night we had the great pleasure of having dinner with our wonderful friends Zack and Molly.  They have two beautiful little boys who are filled with energy!  Just after Molly and I finished dinner, all the food was set out on the table, and the boys had  brushed their teeth and were in bed, we suddenly started hearing chanting coming from their bedroom.  "I'm hungry!!!  I'm hungry!!!" sounded from the bedroom.  We all couldn't help but giggle.  We all knew that there was just too much fun going on in the dining room and Connor and Shep didn't want to miss out on a moment of it!  After fetching them from their beds and smothering some bread in raspberry jam, we all sat down and dove in!

Molly and I spent a fun afternoon together, running an errand to the grocery store with the boys, both happily sampling the chocolate covered strawberries without thinking twice.  Browsing the produce section with little chocolate covered faces, we found all the missing ingredients for our oven roasted veggies.

After reseasoning the cast iron skillet and thankfully not making a smokey mess, or causing a major catastrophe in the kitchen...  we were ready to go!  Molly and I embarked on second cooking adventure (our first being Thanksgiving!).

We served this up with a delicious loaf of bread Molly found at Central Market and some garlic butter we made.  Kind of  a heart attack waiting to happen, but really, it's worth it for the flavor!  (The boys even started smothering their roast with the garlic butter).  :)

We topped the evening off with a fresh Mango Strawberry Sorbet (made in the super, awesome ice cream maker - but could easily be made without one!).  A nice contrast to a heavy, rich dessert.  That recipe will come at a later date.  Promise!

(And one little possibly, slightly selfish thing...  I was given the great pleasure of using their nice camera!  All the more reason I can't wait for Nicholas and me to get a new camera.  We're thinking it might be a nice one year anniversary gift for ourselves!).

Pan Seared Pot Roast
1 pot roast (as many or few pounds as you like!)
1 - 3 tbs butter
Worcestershire Sauce
garlic powder
salt & pepper

Heat oven to 325.

Using a cast iron skillet, heat on medium heat, melting butter (more for a larger roast and less for a smaller - we had a 1.6lb roast and used about 1 tbs butter). 

Season the top of the roast with salt, pepper, and garlic powder.  Once skillet is heated,  place seasoned side-down in the skillet and allow to brown for about 45-60 second.  Season the top of the roast at this point, so once the bottom finished searing, you can turn the roast over and sear the recently seasoned side.  While you are not seasoning, toss some Worcestershire Sauce over the roast and into the pan.  Continue to do this until all sides of the roast (including the ends!) have been seasoned and seared.

Once all sides of the roast have been seasoned place roast in the oven, baking 35 minutes per pound and an internal temperature of 135 is reached.

Remove roast from oven and allow to sit for about 15 minutes before slicing.

Serve with horseradish or this homemade "horseradish-like" sauce!

"Horseradish" Sauce
1 cup sour cream
1/4 cup freshly grated horseradish root
salt & pepper
crushed garlic (if desired)

To prepare the horseradish root, remove the outside, revealing the white flesh.  Grate flesh.  Combine horseradish root and sour cream together.  Season with salt and pepper, and garlic if you'd like, until you reach your desired flavor!


Oven Roasted Veggies
4 red potatoes (diced)
1 red onion (diced)
2 zucchinis (diced)
4 carrots (diced)
1/4 cup (or more) olive oil
2 - 4 tbs butter
salt & pepper
rosemary

Preheat oven to 325 (this works well if you're baking these while the roast cooks!  You may decide to use a higher temperature if you're not cooking the roast at the same time).

In a glass pan, combine all the veggies together.  Season with salt, pepper, and rosemary.  Drizzle over olive oil and top with butter (amount depend on your preference!).

Bake for 60-75 minutes or until potatoes are soft and cooked fully through.  Serve with roast.

Wednesday, May 4, 2011

Spakakopita with Greek Salad

I guess these last few posts have been rather "ethnic" in flavor, but really, I prefer that!  I love having meals from very different nationalities.  Indian... Thai... Greek!  Who knows what's up my sleeves next!

I must be honest.  This morning told me a lot... well, I sent my husband off to school with an apple.  Yes, JUST an apple.  I felt TERRIBLE!!  I try and make him a lunch everyday, but let him have something "special" at least once a week or two.  With life, I just hadn't made it to the store and there was nothing to feed him, which really meant that I had nothing to eat myself either.  Oh... dear... TIME to go to the store.  So what was there in the fridge that could be used for something?  Leave it to me!  Frozen spinach, feta, and Parmesan.  That means ONE thing to me!  :)

Spanakopita is a tasty little pastry that is so satisfying.  Funnily enough, this is another recipe that I made for the first time with Chloe!  :)  We called up her house and got the family recipe!  I can't guarantee it's100% the same.  Since it wasn't a terribly difficult recipe to remember in terms of ingredients, I guess I have morphed it into my own  - with a slight variation in proportions that is.  In my opinion, it's pretty darn close!

Spanakopita
1 large onion (diced - I like red!)
1 bunch green onions (thinly sliced)
1/4 cup + olive oil
3-4 cloves garlic (minced)
salt & pepper
1/4 tsp nutmeg
16 oz frozen spinach (drained - you don't want soggy spinach!)
8 oz feta cheese
3/4 cup grated Parmesan
3 eggs
phyllo dough (1 box)
1/4 cup butter (melted)

Preheat oven to 350.

Heat a skillet over medium heat with olive oil.  Once warmed, toss in the onions, seasoning with salt & pepper.  Allow to saute for a few minutes, adding the garlic.  You may need to add a little more olive oil at this time.  Continue to cook down the onions until they become lightly browned.  Add in green onions at this time and cook down for another minute or two.  Remove from heat and set aside.

Prepare spinach by thawing (in the microwave if necessary) and squeezing out all the excess water.  Combine spinach, onions, and nutmeg together in a bowl.  (I know the nutmeg may sound really weird, but it is traditional and does add a nice flavor!  Fresh nutmeg adds a great flavor if you have it at your disposal).  Stir well, so ingredients are combined.  Add in feta and Parmesan, stirring again to combine.  Check now to taste if more salt or pepper is needed and add as necessary.  Once all the ingredients are mixed well, add in the eggs and stir once more.  You want to be careful that everything is well combined, as a large chunk of unseasoned spinach is not that tasty...

Now for the trickiest part!  There is an "easier" way to this, and doesn't change the flavor at all.

Easy version:  In a 9x13 pan, alternate phyllo dough with filling.  Place 5-6 sheets of phyllo dough on the bottom of the pan, brushing with melted butter.  Next spread a layer of the filling over the phyllo dough, and continue to alternate the two, making sure to butter each layer of phyllo dough, ending with a layer of phyllo dough on the top.  Bake for 25-30 minutes, or until filling is cooked through and not "runny" anymore (this is one way you probably don't want to eat raw egg!).

Traditional version:  Take about 4 sheets of phyllo dough and lay them on a flat surface, so it is taller rather than wider.  Toward the top of the sheet, make a triangle of filling (see picture) about an inch below the top of the phyllo dough.  Fold top "flap" over the filling and then the two sides in toward the center.  Butter a thin layer to help the phyllo dough stay intact.  Next, begin alternating the strip over itself to create a triangle.  Once all the dough has been used, butter both sides and place "seam side down" on a baking sheet.  Bake for about 15 minutes, or until golden brown.

Allow spanakopita to sit for about 5-10 minutes before serving, as the filling is very hot!

Quick Greek Salad
1 cucumber (cut into 1/4 rounds, quartering each round)
2 tomatoes (diced)
1/2 cup kalamata olives
1/4 cup sundried tomatoes (bite-size pieces)
1/4 cup feta cheese
salt & pepper
1/4 cup olive oil
2 - 3 tbs balsamic vinegar

Chop all the vegetables into bite-sized pieces.  Combine all of the vegetables together in a large bowl.  Season with salt and pepper.  Drizzle with olive oil and balsamic and stir well!

Sunday, May 1, 2011

Pad Thai

This weekend I had the great pleasure of witnessing the marriage of two wonderful people: a great friend from my Master's at Rice and her boyfriend/fiance of four-ish years.  It was an amazing ceremony and such a fun time to hangout with some friends.

I have been spending my weekend at my awesome friend Chloe's!!  (my Mango Curry friend!!)  We both love Asian food (and she even wants to be Asian!).  In any case, we brainstormed for quite a long time about what to make tonight (as, of course, with the wedding taking place last night, we didn't have to worry about dinner).  After going through all the options... rice, pasta, potato, bread.... beef, chicken, pork, lamb... (no tofu, please!)... we settled on Pad Thai.

I really, REALLY must be honest.  I don't really like Pad Thai very much!  Maybe it's because I haven't had good Pad Thai?  I don't know...  Maybe there was never enough peanut flavor, or enough lime, or too many noodles with not enough other stuff?  I'm not sure, but I can say without a shadow of a doubt that I LOVE peanut sauce!!!!  I could drown anything in peanut sauce and enjoy it.  So, with that being said, I guess I have made my "own" version of what I think Pad Thai should be, with all the things that are traditionally included!  :)

Peanut Sauce
1 cup peanut butter
1/2 cup rice vinegar
1/4 cup soy sauce
2 tbs sesame oil
2 tsp fish sauce
2 cloves garlic (crushed)
1/2 tsp crushed red pepper flakes
zest of one lime
juice of two limes (large)
1 can coconut milk (full fat!)

In a medium sauce pan, combine peanut butter, rice vinegar, soy sauce, sesame oil, fish sauce, garlic, crushed red pepper flakes, lime zest, and lime juice and stir.  On medium-low heat, begin to simmer sauce, stirring to bring all the ingredients together.  Pour in coconut milk and stir again.  Once fully combined, turn heat down to simmer, stirring occasionally until using.

Pad Thai
3 lbs sliced chicken (tofu, or other meat)
1/4 tbs oil
6 cloves garlic (crushed)
1 14 oz box/bag rice noodles
bean sprouts (about 2 cups)
1 cup green cabbage (sliced thinly, about 2 cups)
green onion (one bunch)
cilantro
shredded carrot
crush peanuts
fresh lime
peanut sauce

Prepare rice noodles as instructed on package.

In a skillet, over medium heat, heat oil and add chicken.  Toss in garlic, a dash of salt, and stir.  Spoon about 1/4 cup peanut sauce over chicken, stir, and continue to cook.  Once chicken has fully cooked, about 5-6 minutes, add in about 1 cup cabbage, 1 cup bean sprouts, and about 2 tsp thinly sliced green onions and allow to tenderize for about 1 minute.  Turn heat to simmer until serving.

On serving plate, top the rice noodles with peanut sauce, chicken and veggies, and any of the other toppings you desire (shredded carrots, cilantro, green onions, crushed peanuts, fresh lime, or even more cabbage and bean sprouts!).  Serve!

This makes approximately six servings.