Thursday, April 28, 2011

Paneer Balti with Chicken

INDIAN FOOD!!!!  I have to be honest.  My first experience?  Well... not so good.  I had to get-up the courage to try it a second time (which happened to be at a completely different restaurant... in a different city... in a different state.  I think that might have done the trick!).  You have got to like spice though.  :)  Which we here do indeed!

Our great friend Pierce made a FIERCE serving of this a couple months back.  Let's just say - it was LEGIT!  Granted neither of us have been to India to try some delicious grub first-hand, but comparing it to our favorite place here in Austin, we were quite impressed!  We told him we needed the recipe (ASAP), and since that day, Nicholas and I have been talking about making it.  We didn't get the recipe right away.  I have to say...  I "accidentally," but jokingly, bothered Pierce today for the recipe when I saw him, unbeknownst to his present headache at the time.  Whoops...  Sorry, Pierce!!  We got our hands on it, so... that's really what matters.  Right?  :)

This recipe was originally for shrimp, not chicken.  You may decide to use tofu even (in place of the chicken or shrimp, or even in place of the paneer if you can't find any).  I'm not sure where this recipe came from (since it is a scanned copy from a book that doesn't display the title, so sorry I can't give credit to anyone!).  Enjoy!

Paneer Balti with Chicken
1 lb chicken (cubed)
6 oz paneer (cubed)
3 tbs tomato paste
4 tbs plain yogurt
1 1/2 tsp garam masala
1 tsp chili powder
1 tsp garlic (minced or powder)
1 tsp ground coriander
2 tsp dried mango powder
1 tsp salt
1/2 cup butter (or ghee)
1 tbs oil (vegetable, canola, etc)
3 green chilies (fresh, miched)
1/4 cup cilantro (fresh, choppped)
2/3 cup cream

In a bowl, combine the tomato paste, yogurt, chili powder, garlic, coriander, mango powder, and salt in a bowl and set aside.

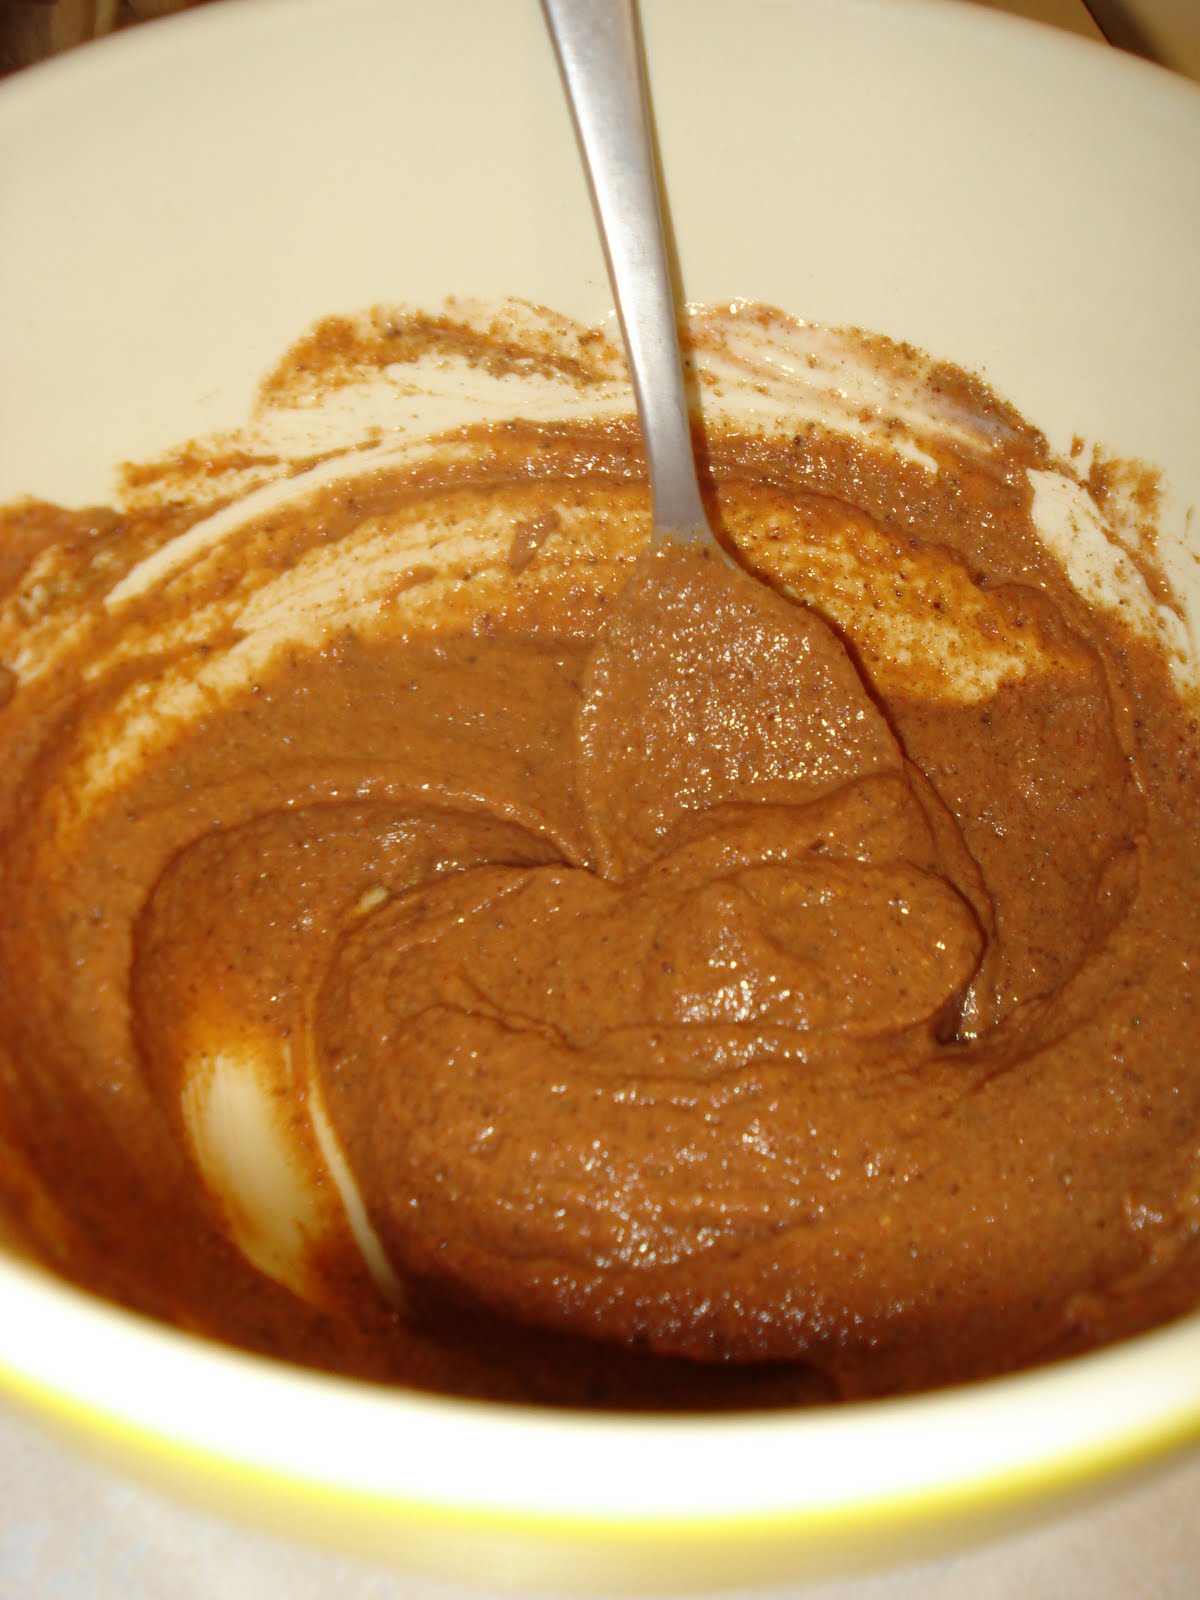
Cube the paneer and chicken into bit-sized pieces (about 1/2").  Melt butter and vegetable oil in a large saucepan or wok.  Once the butter has melted, turn the burner onto medium heat and add in the cubed paneer and chicken.  Allow to cook for a couple of minutes, to begin absorbing the butter and cooking the ingredients.  After a few minutes, remove the paneer and chicken with a slotted spoon and drain on a paper towel.

Add the tomato spice mixture to the saucepan and stir for a minute.  Add the paneer and chicken back in and stir.  Allow the chicken to fully cook through.  Turn heat to low and add in the chopped peppers and cilantro and stir.  Lastly, add in the cream and allow to simmer until ready to serve.

Serve on a warm bed of rice, with naan bread and chutney, or another delicious Indian dish!  :)

Tuesday, April 26, 2011

Lemon Chicken with Creamy Pesto Pasta

Have you ever purchased anything in "bulk" when you only need a little?  You know - when you decide that really, it's just more economical to do it that way, because you're getting a better deal.  Right?  Well... that was certainly me late last week! - from that Margarita pizza on Friday night...  I grabbed a huge container full of basil instead of a little bundle.  It just seemed like it made more sense.  :)  At the time, at least...

I knew that I wanted to make pesto.  That wasn't a difficult decision.  Thankfully, it's not a difficult food to make.  Honestly, though, it has been about four years or so since I have made pesto, and after thinking about it for... oh... let's say... two seconds, I knew I was going to use walnuts and not pine nuts.  Let's just say, first of all, we have some and they should be used, and secondly, unless you own a palace... well, you just don't buy pine nuts that often.

I spent about 36 hours racking my brain for the "most creative ways" to use this pesto.  Let's just say... I guess I haven't quite succeed at being super creative and unique... but I don't think it was a disappointment in the end.  Alas, however!  There is enough pesto for a second recipe.  Don't worry!!!  My goal?  To not let you down!  :)

So... here's take one of the pesto adventure.

Homemade Pesto
4 cloves garlic
3/4 cup walnuts (you can also use pine nuts)
2 1/2 - 3 cups fresh basil, packed (or about 4 oz)
3/4 cup grated Parmesan
olive oil
salt & pepper

In a food processor (or a blender if you don't have one), combine garlic, walnuts, basil, and Parmesan cheese and blend.  Once the mixture has begun to form a paste, add about a 1/4 tsp pepper and 1/2 tsp salt.  Begin to blend again and slowly begin to pour the olive oil into the mixture.  Add olive oil until you reach your desired consistency.  Taste to see if it needs any more salt or pepper and add as necessary.

Creamy Pesto Pasta
1/2 of the pesto recipe
about 3 cups fresh spinach
1/3 or so olive oil
1-2 cloves garlic
1/2 - 1 cup heavy cream
1 box pasta (I used shells, cause they're fun!)
salt

Prepare pasta as directed.

In food processor or blender, combine pesto, spinach, extra garlic, and olive oil.  Blend until creamy and combined.

Drain pasta and put back into the boiling pot.  On medium-low heat, add enough heavy cream to lightly coat the pasta.  Add in spinach pesto and mix.  Season with extra salt if needed.

Serve!

Lemon Chicken
4 chicken breasts (cubed or sliced into 1/4" pieces)
2 large lemons (sliced very thinly) with juice their juice
1/4 cup olive oil
4-5 cloves garlic (crushed)
salt & pepper

Season chicken with salt and pepper on both sides.  On medium heat, warm skillet and olive oil.  Once heated, add in chicken and cook the first side for about 3-4 minutes.  Turn chicken, re-season if necessary, add garlic, and place lemon slices on top of chicken (as well as any excess juice from slicing).  Allow chicken to fully cook, about another 3-4 minutes, stirring lemons and chicken as needed.

Once chicken is fully cooked, remove from heat and serve with pasta.  (Serve with lemon slices if desired, or just the chicken).

Saturday, April 23, 2011

Classic Strawberry Shortcake

I have really only met one person in my life who didn't like strawberries (and really, it wasn't that he didn't like them... he was allergic to them... sorry, Seth!).  Honestly, have you ever seen someone complain when they hear that Strawberry Shortcake is being served?  I'm guessing the chances are pretty slim...  But really, anything is possible.  :)

This American classic has gone so many ways, and is served with so many different "cakes."  Angel food cake, white cake, biscuits, scones...  (No, sorry... my scone recipe isn't going up here.  I have got to have at least ONE secret, right?!).  ;)  I'm guessing you can probably think of at least one other way that it has been served to you, or that you have served it yourself.  Really, it's pretty hard to mess it up, because each cake base and combination are great for different reasons!

Here is a more traditional approach with a soft, flaky, buttery biscuit.  Made with no sugar, these biscuits provide a little contrast, almost a sweet and salty, and are really a great dessert for those who don't crave super sweet desserts.  For those who need a little more sweetness, just sprinkle a little extra sugar on top!

Strawberry Shortcake Biscuits
2 cups flour
1/2 cup butter (room temp)
1 tbs baking powder
1/2 tsp salt
3/4 cup milk
1 tbs sugar (optional - if you're of the sweeter type)

Preheat oven to 425.

Combine the flour, baking powder, and salt (and sugar if you decide to sweeten this recipe) and mix.  Next, cut butter in with a knife and fork, or whatever method you prefer (possibly in a food processor or with a pastry cutter), until the butter is well incorporated into the dry mixture and no large clumps of butter remain.  Next, add in milk and mix just until dough comes together.

Roll out into a cylinder shape and cut into eight equal rounds.  Press down to make a little larger if you feel it's necessary.  (If you'd like to make your biscuits a little sweeter, you may decide to sprinkle some sugar on the tops before baking).  Place on baking sheet and bake for 10-12 minutes or until they begin to turn a light golden brown.

Remove from oven and allow to cool before serving.


Cut biscuits in half and serve with strawberries (fresh are best!) and whipped cream (homemade with a little added vanilla extracts and powdered sugar is my favorite!!).  Welcome summer, and HAPPY EASTER, everyone!!!!

Friday, April 22, 2011

Friday Night Pizza

Homemade pizza is one of the tastiest dinners ever!  (Or late night snack!!!)  And who doesn't like pizza anyway?  My awesome former roommate (from my Rice days) Lynsey and I had a tradition of Sunday Night Pizza Night.  For two years, we managed to do this almost every week (even in the craziest, most stressful times.  It somehow always gave us a brighter outlook on the week.  Sunday nights can sometimes be a bit of a drag...)!

Everyone has a favorite combination or two of toppings.  While Nicholas and I were on our "mini-moon," we had lunch one day at an Italian Pizzeria.  After looking over the menu a few times, debating and weighing the pros and cons of each pizza, we settled on a goat cheese pizza with balsamic onions and figs.  It was SO delicious!!!  Since then, we have been creating our own spin-off of this delicious creation each time we have homemade pizza.

We scarfed down these two pizzas tonight: Balsamic Red Onion and Fig Pizza with Goat Cheese and a classic Margarita Pizza!  Try something new next time you make pizza.  :)

Balsamic Red Onion and Fig Pizza with Goat Cheese
1 pizza crust (about 14")
2-3 tbs olive oil
4 - 8 oz fresh goat cheese
fresh spinach
1 red onion (thinly sliced)
1/4 - 1/3 cup sliced dried figs
3/4 - 1 cup balsamic vinegar
salt & pepper to season

In a sauce pan, heat approx a 1/4 cup of olive oil on medium-high heat.  Once oil has heated, toss in onions and season with salt.  Saute down the onions for about 5-7 minutes before adding in balsamic.  Add about a 1/2 a cup of balsamic to the onions and stir.  Allow the onions to cook down for another 4-5 minutes.  Check to see if more balsamic should be added (and add if necessary).  Add in the figs and about a 1/4 cup more balsamic and stir in.  Allow figs to cook down.  Turn off heat and allow to cool until you're ready to use them.

On pizza crust (see recipe below if you'd like to made your pizza crusts from scratch), brush a light coating of olive oil (if you desire, you may decide to season with some garlic powder or fresh garlic).  Top with cheese then spinach.  It'll seem like a TON of spinach, but it'll cook down substantially once in the oven.  Put the cooked onions and figs on top of the spinach.  Season with salt and pepper if desired.

Bake at 400 or 425 for 11-14 minutes or until the crust is baked and the cheese is melted.  Let stand for a few minutes before cutting.

Classic Margarita Pizza
1 pizza crust (about 14")
12 oz mozzarella
1 - 2 medium tomatoes (thinly sliced)
fresh basil (as much or as little as you like!)
2 - 3 tbs olive oil
salt & pepper to season

Slice tomatoes (and remove excess water - patting down with paper towels is the easiest way!).  Julienne basil (or if you prefer, leave basil leaves whole).  Lightly brush pizza crust with olive oil.  Sprinkle some basil on the crust (reserving some for later).  Add most of the cheese on top, following with the tomatoes.  Toss extra cheese on top.  Season with salt, pepper, and garlic powder if desired.

Bake on 400 or 425 for about 8 minutes.  Remove from oven and top with extra basil.  Bake for another 3-5 minutes or until cheese is fully melted and crust is lightly golden brown.  Let cool for a few minutes before slicing.

Pizza Crust
1 cup warm water (temp of 105-110)
1 package yeast (or 2 1/4 tsp)
3/4 tsp salt
1 tsp sugar
2 - 4 tbs olive oil
2 1/2 - 3 cups flour (use whole wheat if you desire)

In a bowl or stand mixer, combine water, yeast, salt, sugar, and 1 tbs olive oil and give a gentle stir.  Let this mixture rest for 10-15 minutes or until the yeast begins to react and bubble.

(Best in a stand mixer, using the dough hook), begin adding the flour, alternating with some olive oil, until everything comes together and forms a nice ball.  Remove dough from the bowl, cover lightly with olive oil and allow to double in size (this will take a couple of hours).  You can always skip the rising step, but your dough might start to bubble as you're pre-baking the crust.  :)

Divide dough into two equal balls.  On baking sheets, toss a little cornmeal (this will help the dough from sticking to the sheet - so much easier!).  Roll out dough (you can make it a little thicker or thinner depending on how your like your crust).  It's nice to pre-bake these for about 4-5 minutes each to give the crust a little bit of a head-start to you're not left with a slightly soggy crust under your pizza.

Thursday, April 21, 2011

Mango Ginger Smoothie

Do you ever find yourself buying more fruit than you end up eating?  You see a good deal on something you really like, you get excited, throw two or three too many in your basket/cart, keep going, and don't even think about it until your back home, three days later and wondering... how in HEAVENS name am I going to eat all of these?!  There are TOO many other things that need to be consumed as well!

Well... that just happened to me this last week.  I have a HUGE weakness for mangoes... HUGE!!  I love them.  LOVE THEM!  And, in almost any case, will eat them with anything they're served with!  (Hence the Mango Curry being a regular here...).

Smoothies are something I love to drink!  I had a huge smoothie fest almost every day last summer.  Someone else got a little burnt out of them after... oh... three or four days, so it became a solo quest after not too long.  Oh well!  I still enjoyed them!

Two mangos... some ginger... a banana or two needing to be used.  I think I can manage that!  :)

Mango Ginger Smoothie
2 mangoes (peeled, sliced)
1/4 - 1/2 tsp freshly grated ginger (don't use too much!  You won't taste anything else, otherwise...!)
1 banana (or more if you need to use them!)
1 tsp vanilla
a dash of orange juice (1/4 cup or so)

Toss it all in the blender.  Puree.  Voila!  It's that easy!!!

Remember... go easy on the ginger.  Unless you don't want to taste anything else!  ;)  (Nope... not that I have ever accidentally had that problem!)

Tuesday, April 19, 2011

Blood Orange Mint Granita


Hello there! It's me, Anna! I'm still here, I swear! I've just been slaving away finishing my masters, having a recital and managing my own little blog while Lexi has been whipping up some fantastic creations! Isn't she a peach?

But we were finally able to do a little hanging out the other night when the husbands were off in some other far away land. We really can't keep track of where they are these days. Pretty sure they've been gone for about one million weekends. Hopefully we'll get them back soon.... or ELSE.

Back to this post. We're obsessed with blood oranges. I think you might have caught wind of that. We talk about them every time we're together, we dream about them and we might even think of naming our babies after them. Jokes. But this little dessert is inspired by the sacred fruit and would be the perfect ending to any meal. It has a light, refreshing taste and makes the most darlin' little picture. Yeah, we know they're not in season. We don't care. Blood oranges all year round!!!

Blood Orange Granita with Mint and a Splash of Agave

3 blood oranges, juiced
1 lemon, juiced
2 tbs mint, chiffonned
1 tbs agave


Combine all ingredients in a medium sized bowl. Whisk together. Pour into a 9x13 dish and place in the freezer. If desired, scrape with a fork every thirty minutes OR wait six hours, then scrape into fluffy mounds of goodness.
 

Sunday, April 17, 2011

Fig Bars!! ... just like you remember from your childhood

Please raise your hand if you don't remember eating fig newton bars as a child!  Okay... if you're the only one if the room, then don't feel silly, because no one is looking.  If you're not the only one in the room, and well, you're raising your hand... then you MIGHT just be one of the few people that didn't enjoy these growing up.

Many, many times I have been grocery shopping and stopped and stared at these packaged "cookies," telling myself, "oh, these aren't that bad for me!  It's like eating a granola bar or something.  You know, because it has fruit on the inside.  And well, it's not REALLY a cookie, because it isn't shaped like one.  And..."  I had SO many reasons to argue it being "healthy" for me.  And, I guess in the grand scheme of things, there are much worse things that one could eat.  With this recipe, I can actually argue them feeling more healthy.  Without pounds and pounds of sugar and made with fresh squeezed orange juice and 100% pure apple juice, you're consuming a lot of natural sugars instead of the refined ones!  I'm good with that.  (And for you vegans out there, I really think this one could be easily made vegan with just a few, tiny adjustments!!).

There is a rather large bag of dried figs sitting in our fridge right now.  I must say, I'm a huge fan of Costco (and other wholesale food stores that "cater" to us student-types of folks!).  I'd say we're really getting our moneys worth out of this bag.  I really do enjoy figs, but I find I can only eat two or three at a time before I start to go crazy.  I like them in small quantities and think they're incredibly versatile!  (I made that Moroccan Chicken way back at the beginning of this adventure with figs!).  What a great way to use these little guys!

This recipe was adapted from a posting I found on The Boastful Baker.  She had adjusted her recipe slightly from a book called Desserts by the Yard (so hopefully my small changes aren't exactly what were in the original recipe!).

These bar "cookies" have a great fig/orange flavor to them.  (If you want them a little more "figgy," like figgy pudding, you might want to reduce the orange zest and just use water in place of the fresh orange juice).  Happy baking!

Childhood Fig Bars
Filling
   1 cup (packed) finely chopped dried mission figs
   1 1/2 cups apple juice
   1 cup orange juice + water (juice one orange and add water to make a full cup of liquid)
   1/4 cup sugar
   1/2 tsp orange zest

In a medium or large sauce pan, add chopped figs, apple juice, orange juice (+water), and sugar.  Bring to a boil, stirring constantly.  Lower heat to medium-low or low (simmer if you have a good stove-top, unless us!!), and allow to cook off the liquid.  This can take anywhere from an hour to two hours.  Be patient!  It'll be worth it in the end.  :)

Once the figs are very soft, and a spreadable consistency, remove from heat.  Add orange zest and blend in a food processor or blender until smooth.  Allow to cool.

Dough
   1 stick butter (salted and room temp) - add 1/4 tsp salt if using unsalted butter
   1/2 cup sugar
   1 - 1 1/2 tsp orange zest
   1 egg
   1 tsp vanilla
   1 1/2 - 1 2/3 cups flour

In a stand mixer, cream butter, sugar, and orange zest until light and fluffy, scraping down the sides before moving on to the next step.  Add eggs and vanilla and allow to completely incorporate.  Again, scrape down the sides of the bowl.  Next, add flour and mix on low, just until blended.  You may decide that you like your dough a little more firm, so add the extra bit of flour.  I like creamy, softer dough, so I usually use a little less than most people!  (I don't believe in crunchy/dark cookies!  Only ones that are soft, gooey, and melt in your hands as you're eating them!  Or rather... I skip the second step and just eat the dough!!).

To assemble the cookies...

Preheat the oven to 350.

Flour the surface in which you're going to be rolling out the dough.  Roll out the dough into a rectangle about 12" long and it about a 1/4" of an inch thick.  The dimensions will probably be around 12x24, but the most important thing I found was making sure the the cookie was thick enough, otherwise, the fig filling will start to fall out of the dough as you're wrapping it up!

Next, cut the dough (long ways) into about 4" stripes (12x4).  In the center of these, evenly distribute the filling.  Make sure you give it a decent amount of filling, otherwise the dough will overwhelm the cookie and you won't be able to enjoy the fig part (you might as well be making orange cookies otherwise!).

Fold up both sides of the dough, sealing it with your fingers at the seam.  Place the cookie log onto a baking sheet, seam side down.  You might want to place some parchment paper, wax paper, or foil down on your baking sheet.

Bake for 18-22 minutes (or once cookies look light brown).  Remove from oven and allow to cool for about 10 minutes before cutting into 1" pieces.

Thursday, April 14, 2011

Kebab-Delicious

If you're from Austin, then you know that we're known for our food trailers here.  Goodness!  There are some awesome places to get some tasty grub here!  I'm not usually one for going out to eat, but I can say, in these next few short months, I might just have to change that.  I can say, without a doubt, that the thing I will miss the most is Kebabalicious.  Nothing, I mean, nothing compares.  Maybe I have just become biased...  It is just THAT good in my opinion!

I have to say that I have always enjoyed Middle Eastern foods.  Funnily enough, when Nicholas and I were honeymooning in New Zealand, we happened upon a food court with booths representing all sorts of ethnicities; Thai (NOM!!!), Chinese, Japanese, Koren BBQ, Middle Eastern, just to name a few.  It was kind of a tough decision for both of us.  We walked back and forth... back and forth... between all of them for about 10 minutes looking at all the menus and smelling the amazing food wafting through the air.  We couldn't make a joint decision, so we decided to each go for our own.  It really was a difficult decision for me to choose between Thai and Middle Eastern, but I finally decided, since it's generally a little easier to get ahold of Thai, and I make it often enough, that I needed that lamb/beef combo with tzatziki.  I didn't regret it for a moment!  There's something about those flavors for me that are always satisfying.

If you don't have a doner kebab "cooker," you're not alone.  It's really not possible to be authentic and roast the meat to get the real doner kebab taste, so it has certainly posed the biggest challenge in replicating this kebab.  It's still a work in progress, but I can honestly say that with the spices we used tonight, we really liked the flavor of the final product!

Served with the creamy yogurt Tzatziki sauce, a bright harissa sauce, and fresh veggies on a warm pita, this meal is to die for.  :)

"Doner Kebab" Beef
1 1/2 lbs beef (steak or tenderloin are good options) sliced thinly (you can also use lamb, chicken, or have a combination of them)
2 - 3 tbs olive oil
1/4 - 1/3 cup Greek yogurt
1 1/2 tsp ground coriander
1 tsp garlic powder
1/2 tsp cinnamon
1/2 tsp cumin
salt
pepper

Season meat with salt and pepper.  Toss into a gallon zip-lock bag and add the yogurt, coriander, garlic, cinnamon, and cumin.  Allow to marinade for at least two hours.

On medium heat, place olive oil in a skillet and heat.  Add the beef and marinating sauce into saucepan and cook until cooked through, about 6-9 minutes, depending on how thick/thin your cut is.  Careful not to overcook the meat, as it will get tough and won't be pleasant to eat...

Warm pitas in the oven as directed.  Top meat with tzatziki sauce and harissa sauce.  Some great vegetables are lettuce, fresh diced tomatoes, red onion, and parsley.  Someone I know quite well also enjoys topping his off with feta (or spicy feta like Kebabalicious serves!).  :)

Tzatziki Sauce
1 cucumber (cut thinly, and then diced into 1/4" pieces)
1 - 1 1/2 cups Greek yogurt
zest of one lemon
juice of lemon
1 tsp salt (less if desired)
1 tsp garlic powder (I have used both fresh and powdered - both give it a nice flavor)

Combine all ingredients together and stir well.  It's best if this is made a couple of hours in advance.  This allows the ingredients to combine and the flavors to blend.

Harissa Sauce
1 large tomato (or three small)
1/2 fresh red pepper
1 jalapeno
2 tbs olive oil
1 tsp paprika
1/2 tsp salt
4 garlic gloves
3 tsp coriander
1 tsp crushed red pepper flakes
1/2 tsp cumin

Combine all the ingredients in a blender and puree until it creates a smooth sauce.

Wednesday, April 13, 2011

Spicy Cajun Pasta

As about 99.99% of the world's population cannot live without pasta, it's only appropriate that a recipe every now and then is dedicated to this staple carbohydrate.  I must be honest.  I know, I know... I'm married to an Italian... but I actually could live in that 0.001% of the population, so every once in a while, I need to dedicate a meal to my Stallion.  :)

This dish is inspired by a pasta dish Nicholas ordered at Whole Foods a while back.  Every time we go with the intention of eating, we always split this dish.  The way they make it has shrimp and sausage.  Now, since I'm not a seafood fan, I always hand mine over, so if you're a shrimp lover, then you might want to add some to your dish!

In the few times that I have made this, I have used both link and ground sausage.  The two of us differ in our preference for ground verses link sausage, so go with whatever you desire!  There are certainly a number of different ways to make this dish your own.  Have fun!  Experiment!

Spicy Cajun Pasta
1 lb pasta
4 link sausages or about 1 lb ground sausage (we like hot, but use medium or mild if you prefer!)
1 large red onion
1 red pepper
2 medium tomatos
1 1/2 - 2 cups heavy cream
3/4 - 1 cup white wine
3 - 4 cloves garlic (minced), more if you desire
1 - 2 tbs cajun spice blend (see below)
2 - 3 tbs olive oil
salt
pepper
1/2 - 1 cup grated Parmesan

Begin by slicing the onions and peppers into thin strips about 1 1/2" long.  Heat a large skillet on medium-high heat.  Heat olive oil.  Once oil has heated, toss in onions and peppers with the minced garlic, season with salt and pepper.  Cook down until tender (about 8-10 minutes).  Remove from heat.

If using link sausage, cut into bit-sized pieces (about 1/2" thick).  Toss meat (either link or ground sausage) into the same skillet.  If necessary, season to taste.  Cook for about 2-3 minutes, then turn heat to high. Toss in about 1/2 cup of wine and allow the alcohol to burn off as the sausage continues to cook.  Once fully cooked, add sauteed vegetables back in.  Add heavy cream, remaining white wine, and spice blend.  Turn heat down to simmer and allow flavors to blend.

Dice tomatoes into about 1/2" pieces.  Remove seeds if desired.  Add tomatoes and Parmesan.  Stir to allow cheese to melt.

Taste.  You may decide that you'd like more salt, Cajun spice, cream, wine, or Parmesan.  If it's too spicy, try adding a little sugar (about 1 tsp) to cool down the heat.

There are two serving options.  Either serve sauce over cooked pasta, or add cooked pasta to sauce and keep on simmer for a few minutes, allowing the sauce to coat the pasta.  Serve!

Cajun Spice Blend
1 tbs cayenne
1 tbs paprika
1 tbs chili powder
1 tbs garlic powder
1 tsp crushed red pepper flakes
1 tsp ground pepper
1 tsp salt
1/2 tsp thyme

Blend all the spices together!

There are a number of variations on this recipe.  This is a blend that I adapted from personal preference.  If you like some of the following spices, then try them out!  Some other recipes call for; sweet basil flakes, onion powder, bay leaf, oregano, ground mustard, ground cloves, nutmeg, cumin, sage, parsley.... The list could go on and on!

Sunday, April 10, 2011

Chocolate Irish Cream Tart

Our awesome friends, Pierce and Lindsey, invited Nicholas and me over for dinner a couple of nights ago.  As always, I wanted to offer anything I could!  Lindsey at first, via text message suggested we bring a "desert" over, in which I responded, "I don't know if we can manage a whole desert... but we'll certainly bring a dessert of some kind!"  (Sorry, Lindsey, just had to add the humor from the text conversation.  :)  Anna and my mother can both vouch that quite often, I miss a number of things as I'm quickly writing a message!).

So... that big bottle of Irish Cream that I got for St. Patrick's Day (when I found out you can buy alcohol at 10:00am in Texas...) has been sitting in the fridge and asking to be used for quite some time now.  'Another dessert,' I thought!  After searching numerous recipes online and finding things that only called for about a teaspoon or so of Irish cream, recipes that really just sounded awful, or called for a couple of ingredients that I didn't have, and since I didn't have the car at my disposal to get those few items, I was feeling "out of luck."  I finally stumbled upon a rather tasty sounding recipe... a chocolate tart!  Looking over the recipe, I found that I have everything (with the small adjustments I always end up making to a recipe to put my own stamp on it!) except for one thing... sweetened condensed milk...

I must be honest.  I have used sweetened condensed milk a number of times, especially when making a few bar cookie recipes that I LOVE.  But has anyone else ever been grossed out when opening that can?  I started looking for "sweetened condensed milk substitutes" in Google and, to my dismay, continually was finding recipes that called for milk powder.  "Well, that's great... lovely..." another thing I didn't have (and didn't want to own anyway).  I finally narrowed my search by adding "with milk" and came across a great site with a homemade recipe that called for, hold your chair, REAL milk!!!  I can't say I looked around after finding this recipe, www.kitchenstewardship.com got me started on the right track.  I adjusted her recipe a little, as I didn't have white sugar (only brown and powdered - can you tell that I'm using EVERYTHING I can?!) and didn't want to wait the 2+ hours she said it can take (and since I didn't quite HAVE those two hours), I sped the process up a little by whisking much more frequently and on a higher temperature, but came out happy in the end with the result.

And thus was born this chocolate tart!  (Inspired and adjusted from the recipe on Better Crocker - wanted a chocolate crust and a white whip cream topping - the opposite of what the recipe called for).

Chocolate Irish Cream Tart
tart dough
   1/2 cup butter (room temp)
   1 cup flour
   1/4 cup cocoa powder
   2 tbs powdered sugar
   1/4 tsp salt

Preheat oven to 400.

Combine dry ingredients together and mix.  Fork butter in until a smooth, firm ball is formed.  This makes a rather unsweet crust, which I thought might be good, since the rest of the dessert was going to be quite sweet.  So if you want to make it a little more "cookie like," then add more sugar to the recipe (about a 1/3 a cup or so, depending on personal taste).

In either a tart pan, spring-form pan, or pie plate, spread dough over the bottom and about 3/4" up the side of the pan, making the crust as even as possible (unless you like a lopsided tart!).  :)

Bake for about 15 minutes.  Remove from oven, and allow to cool while you make the filling.

chocolate Irish cream filling
   1 14 oz can sweetened condensed milk (for the recipe I used, look below)
   1/3 a cup Irish cream (or heavy cream if you don't want the alcohol)
   1 cup semisweet chocolate chips (melted)
   1/4 cup cocoa powder
   2 eggs

Turn oven down to 350.

If you're using a can of sweetened condensed milk, then heat the chocolate chips either in a double-boiler or in the microwave until smooth.  (If using the microwave, you must be very careful, checking it every 15-20 seconds once it begins to melt, otherwise you'll burn the chocolate chips and they'll taste nasty!  I learned my lesson QUITE early on in life with that one...  Whoops!).  Stir in cocoa powder to the melted chocolate chips.  Add the sweetened condensed milk, Irish cream, and stir.  Once the mixture has cooled down, add in the two eggs (make sure you don't add it while it's too hot, as you probably don't want cooked egg chunks inside your tart!).

Pour batter into crust and return to oven for 15-20 more minutes, or until the center is no longer loose.

Allow tart to cool completely, refrigerating once it has cooled, so the whipped cream won't melt on top!  (This should take about two hours or so).

Homemade Sweetened Condensed Milk
   3 cups milk (whole is probably best, but I used 2% as that's what we had)
   1 cup sugar (again, I used brown, but white would be "traditional")
   1/3 cup butter
   2 tsp vanilla

In a sauce pan, combine milk and sugar.  On medium-low (or medium on our stove...), stir mixture so sugar dissolves.  Once the mixture has come to a low boil, turn down heat to low (or simmer if you'd like to wait the full 2+ hours), stirring occasionally so that the milk doesn't burn.  I found a whisk helpful to keep the sugar incorporated.  Make sure you check on the mixture every five minutes or so!

Once the liquid has reduced to about half, check the amount in a measuring cup.  You'll need it to have reduced to about 1 1/2 - 1 3/4 cups.

At this point, remove from the heat, adding butter and vanilla, and stir until butter has dissolved.

When the mixture was still warm, I melted the chocolate chips inside the sweetened condensed milk I had made and allowed it to cool in the fridge for a short while before I finished making the filling.

Once the mixture was cool enough to add eggs to, in a blended, I poured the milk mixture, added the Irish cream, and cocoa powder and mixed until they blended together.  Remove from the blender and mix eggs in until mixed together.  Pour into tart shell as above and bake and cool as directed.

Irish Cream Whipped Cream
   1 cup heavy cream
   1/4 cup powdered sugar
   2 tbs Irish cream

With a hand or stand mixer, combine ingredients, and beat on medium-high to high speed until peaks begin to form.  Don't over beat, unless you want to spread some sweet Irish cream butter on your bread!

Put on cooled tart and place in fridge until served!

To serve, pour a little more Irish cream over the top, serve with raspberries, chocolate shavings, or whatever might sound tasty on top!  (Or really, you don't need to add much more.  It's pretty rich already!).

Thursday, April 7, 2011

Beef Tacos with Sriracha-Tzatziki sauce

 So, remember when I said that I loved watching Ming?  Well, there are many times in which I want to reach through the television and grab what he's making (most notably when he was making donut recipes a couple weeks ago...!!)  If you have never watched his show, he has a unique format in which he chooses two "flavors" or ingredients, one from the East and one from the West, and finds creative and innovative ways to combine them.  This specific episode, Ming was working with Sriracha and Greek yogurt - two ingredients that I find rather tasty!

Just last night Nicholas was craving some Sriracha, and once again, rummaging through the fridge, freezer, and cupboards, we settled on Sriracha chicken and fried rice (which turned out rather well).  All that to say, I guess we're on a few day "Sriracha spree" here!  Who knows.  Something in the next few days might materialize with some of that spicy red sauce in it.  ;)

This recipe, unlike the last one, is almost exactly what Ming made.  Although he made it with ground lamb (which wasn't available at the store I was at, and last I used lamb, sadly, :( I had a negative comment...), I used ground beef, as it's much more readily available and is standard amongst many Americans.  The sauce gives a great taste to this otherwise "standard" dish!

Beef Tacos
1 1/4 lbs ground beef
1 red onion (finely diced)
1 jalapeno (finely minced)
3 gloves garlic (minced)
1 tsp fresh ginger
2 tsp cumin
salt
pepper
olive oil
juice of one lemon

Heat large skillet over medium-high heat.  Allow oil to heat (not too much, but enough to create a thin layer on the bottom of the skillet).  Toss onions, jalapeno, garlic, ginger, cumin, and season lightly with salt.  Saute until lightly browned.  Add beef, seasoning with salt and pepper, and allow to cook fully.  Before removing from heat, toss the lemon juice over and stir.

Sriracha-Tzatziki sauce
1 cup plain Greek yogurt
1 - 2 tbs sriracha sauce (more if you like it extra spicy!)
1 cup cucumbers (finely diced)
zest of one lemon
salt and pepper to season

In a bowl, combine yogurt, sriracha, cucumbers, and zest.  Stir.  Season with salt and pepper (stirring again).

Heat tortillas in the oven or on the stove (in the microwave if you really want to speed-up the process!) until warm.  Serve with iceberg lettuce (maybe even some tomatoes or cilantro!).  You could even make this an appetizer and use small tortillas.  :)

Wednesday, April 6, 2011

Blood Orange Bars

Blood oranges?  I had been curious FAR too long, and Anna and I had talked about them plenty of times.  Well, I finally got my hands on some and was racking my brain for things to make with them!  Anna and I have a cupcake recipe in mind with them, but I wanted to hold off of that so we could do it together.  I had thought about different dinners, desserts, etc and I kept coming back to the idea of reworking the traditional lemon bar.

A blood orange is beautiful when you cut into it.  It has a nice, deep color that is rather unexpected if you're assuming it's a regular orange.  The striking "tiger-like" strips are captivating.  Picturesque, really.

I must be honest...  It has never been one of my favorite desserts.  My family has a different type of lemon dessert that we call a lemon bar, and we all know what we mean when we say that amongst us Bryant-Tronset individuals, but when speaking with the "general public," I know what a lemon bar is to about 99.99999% of the world's population.

So, here is my first attempt, ever, at making a "traditional" lemon bar-like dessert.  :)  This recipe was adapted from the Joy of Baking lemon bar recipe.


Blood Orange Bars
crust:
   1 cup flour
   1/4 cup powdered sugar
   1/2 cup butter (room temperature)
   zest of one blood orange
   1/4 - 1/2 tsp salt
   1/2 tsp vanilla

filling:
   3/4 cup white sugar
   2 eggs
   1/3 cup blood orange juice (about two oranges)
   zest of one blood orange
   1/2 tsp salt
   1/2 tsp vanilla
   2 tbs flour

Preheat oven to 350.

In a stand mixer, combine the six ingredients for the crust and mix together just until blended.  In a greased 8x8 pan, press dough into bottom of pan and spread smooth.  Bake for approx 20 minutes, or until lightly golden brown.  Remove from oven and place on wire rack while preparing the filling.

In a bowl (or stand mixer), combine sugar and eggs and beat until fluffy.  Add juice, zest, salt, and vanilla and mix.  Lastly, add flour in and mix so there are no clumps of flour.  Pour over warm crust and return to over for about 20-25 minutes more.  Check on the cookies a few times, as you want to remove the pan from the oven once the center is no longer liquidy and can hold shape.  If you over-bake, you might get a rather funny texture...  :)  Remove from oven once again and allow to cool on the wire rack. 

One the bars have come to room temperature, sprinkle lightly with powdered sugar and serve!

What kinds of recipes are you curious about seeing on here?  Leave a comment!  :)

Friday, April 1, 2011

Mango Curry

This is one of Lexi's favorite recipes... of ALL time!!!  This is the best recipe to please everyone (unless they don't like mango...)!  My dad and husband don't really care for coconut, but in curries, they don't even notice the flavor of the coconut milk and the recipe, or almost any Thai-like curry, just doesn't taste right without it.  :)  Guess what vegan?!  It's already vegan!  And for you meat fans or tofu lovers, and all you need to do is saute up some chicken (best for this recipe) or tofu and toss into the curry.

Over time, this recipe morphed from a recipe my mom and I ran into at one of our favorite groceries stores back home.  It started out as a mango curry using mango chutney, hot madras curry powder, and heavy cream (in substitute for coconut milk).  After making it for two of my awesome friends, Chloe and Aya, at an end of the semester relax dinner celebration, I inspired Chloe to go and make her own version.  So, after combining forces and recipes, it has mostly morphed into Chloe's recipe, but here's the result that has become a regular for me.

Mango Curry
approximately 4 - 5 cups chopped vegetables, or roughly the amounts listed below
     2 bell peppers (we used one red and one green)
     2 red onions (or one white, one red)
     1 head broccoli
     3/4 cup snow peas
1 mango (sliced and cubed)
1/2 - 1 cup golden raisins (optional)
salt and pepper
1/4 cup oil (or enough to saute vegetables)
1 - 2 tbs sesame oil
1 - 2 tbs soy sauce

Chop vegetables into desired size.  In a wok, skillet, or pot, heat oil on medium-high heat.  Once oil is heated, toss vegetables, season with salt, pepper, and sesame oil.  Cook down until tender, seasoning with some soy sauce while the vegetables are cooking down.  If you'd like, you may like to add some extra garlic, but there is a decent amount in the sauce.  (I recommend seasoning any meat you add in with garlic, though).

Once the vegetables have cooked down, add curry sauce and turn heat to low or medium low so the curry stays warm.  About five minutes before serving, toss in mango and raisins (if desired).  If adding meat or tofu, add at this point.

Serve over rice or with naan bread.

Curry Sauce
1 large mango (sliced)
1 red or orange pepper (sliced)
1 15 oz can crushed pineapple
1 13 oz can coconut milk (full fat)
1/2 - 3/4 cup rice vinegar
3/4 - 1 cup apple cider vinegar
1/2 - 1 tsp salt
1/2 - 1 tsp crushed red pepper flakes
1/8 - 1/4 tsp tumeric
3 gloves garlic
1" fresh ginger
2 - 3 tsp hot madras curry powder
1 - 2 tsp curry powder ("traditional" yellow curry)
sugar (optional, if you'd like it a little sweeter)

In a blender, puree all of the ingredients together.  If there isn't enough room if your blended, then hold off on some, or all, of the coconut milk.  Vary the amounts of each spice and vinegars depending on your personal taste.  You may also decide you want a less intense curry flavor or to use red curry or omit the hot madras curry and substitute it with all "regular" curry.  If it's too tart or your mango isn't ripe enough, then you might want to add a little sugar to sweeten it up. To make it creamier, add extra coconut milk (using only the delicious full fat kind!  Don't skimp!!!).