Showing posts with label dessert. Show all posts

Sunday, August 7, 2011

Nerd Ice Cream

It's almost unbelievable to me that an entire month has passed since I last posted.  Then again, life has been NUTS '"round these parts" and some days, getting anything done is a task in and of itself!

A while back (aka... while we were still in the great state of Texas - when I still had access to my amazing Kitchen Aid and ice cream maker attachment...) I made a number of different ice cream recipes.  I thought August would be a great time to whip those out, seeing as this is the perfect weather for a cold treat.  :)

I know I promised (a month ago...) that I would next post the sequel to the Grilled Kebabs, but alas, those pictures are currently trapped on my camera until the cord is found (amongst thousands of boxes)... so... here we go!  I nice, cool dessert for a hot summer night!  OH.. and I have been brainstorming a new name for the blog, as we'll be living in a new apartment.  Only seems fitting!

Nerd Ice Cream
1/2 cup sugar
1 cup milk
2 cups heavy cream
pinch of salt
vanilla extract (about 2 tsp)
1 large box of nerds (or 3-4 small boxes)

Mix sugar and milk in saucepan over medium-low heat until sugar is dissolved.  Take off heat and add in salt and vanilla.  Let cool completely and then add in heavy cream.

Transfer the mixture to an ice cream maker, following the manufacture's instructions.  Once ice cream is almost done mixing, pour the Nerds in and let mix for another minute or two.  Remove ice cream from the ice cream maker, place into either your freezing container or another bowl.

Let sit for at least six hours to harden.

Saturday, April 23, 2011

Classic Strawberry Shortcake

I have really only met one person in my life who didn't like strawberries (and really, it wasn't that he didn't like them... he was allergic to them... sorry, Seth!).  Honestly, have you ever seen someone complain when they hear that Strawberry Shortcake is being served?  I'm guessing the chances are pretty slim...  But really, anything is possible.  :)

This American classic has gone so many ways, and is served with so many different "cakes."  Angel food cake, white cake, biscuits, scones...  (No, sorry... my scone recipe isn't going up here.  I have got to have at least ONE secret, right?!).  ;)  I'm guessing you can probably think of at least one other way that it has been served to you, or that you have served it yourself.  Really, it's pretty hard to mess it up, because each cake base and combination are great for different reasons!

Here is a more traditional approach with a soft, flaky, buttery biscuit.  Made with no sugar, these biscuits provide a little contrast, almost a sweet and salty, and are really a great dessert for those who don't crave super sweet desserts.  For those who need a little more sweetness, just sprinkle a little extra sugar on top!

Strawberry Shortcake Biscuits
2 cups flour
1/2 cup butter (room temp)
1 tbs baking powder
1/2 tsp salt
3/4 cup milk
1 tbs sugar (optional - if you're of the sweeter type)

Preheat oven to 425.

Combine the flour, baking powder, and salt (and sugar if you decide to sweeten this recipe) and mix.  Next, cut butter in with a knife and fork, or whatever method you prefer (possibly in a food processor or with a pastry cutter), until the butter is well incorporated into the dry mixture and no large clumps of butter remain.  Next, add in milk and mix just until dough comes together.

Roll out into a cylinder shape and cut into eight equal rounds.  Press down to make a little larger if you feel it's necessary.  (If you'd like to make your biscuits a little sweeter, you may decide to sprinkle some sugar on the tops before baking).  Place on baking sheet and bake for 10-12 minutes or until they begin to turn a light golden brown.

Remove from oven and allow to cool before serving.


Cut biscuits in half and serve with strawberries (fresh are best!) and whipped cream (homemade with a little added vanilla extracts and powdered sugar is my favorite!!).  Welcome summer, and HAPPY EASTER, everyone!!!!

Sunday, April 17, 2011

Fig Bars!! ... just like you remember from your childhood

Please raise your hand if you don't remember eating fig newton bars as a child!  Okay... if you're the only one if the room, then don't feel silly, because no one is looking.  If you're not the only one in the room, and well, you're raising your hand... then you MIGHT just be one of the few people that didn't enjoy these growing up.

Many, many times I have been grocery shopping and stopped and stared at these packaged "cookies," telling myself, "oh, these aren't that bad for me!  It's like eating a granola bar or something.  You know, because it has fruit on the inside.  And well, it's not REALLY a cookie, because it isn't shaped like one.  And..."  I had SO many reasons to argue it being "healthy" for me.  And, I guess in the grand scheme of things, there are much worse things that one could eat.  With this recipe, I can actually argue them feeling more healthy.  Without pounds and pounds of sugar and made with fresh squeezed orange juice and 100% pure apple juice, you're consuming a lot of natural sugars instead of the refined ones!  I'm good with that.  (And for you vegans out there, I really think this one could be easily made vegan with just a few, tiny adjustments!!).

There is a rather large bag of dried figs sitting in our fridge right now.  I must say, I'm a huge fan of Costco (and other wholesale food stores that "cater" to us student-types of folks!).  I'd say we're really getting our moneys worth out of this bag.  I really do enjoy figs, but I find I can only eat two or three at a time before I start to go crazy.  I like them in small quantities and think they're incredibly versatile!  (I made that Moroccan Chicken way back at the beginning of this adventure with figs!).  What a great way to use these little guys!

This recipe was adapted from a posting I found on The Boastful Baker.  She had adjusted her recipe slightly from a book called Desserts by the Yard (so hopefully my small changes aren't exactly what were in the original recipe!).

These bar "cookies" have a great fig/orange flavor to them.  (If you want them a little more "figgy," like figgy pudding, you might want to reduce the orange zest and just use water in place of the fresh orange juice).  Happy baking!

Childhood Fig Bars
Filling
   1 cup (packed) finely chopped dried mission figs
   1 1/2 cups apple juice
   1 cup orange juice + water (juice one orange and add water to make a full cup of liquid)
   1/4 cup sugar
   1/2 tsp orange zest

In a medium or large sauce pan, add chopped figs, apple juice, orange juice (+water), and sugar.  Bring to a boil, stirring constantly.  Lower heat to medium-low or low (simmer if you have a good stove-top, unless us!!), and allow to cook off the liquid.  This can take anywhere from an hour to two hours.  Be patient!  It'll be worth it in the end.  :)

Once the figs are very soft, and a spreadable consistency, remove from heat.  Add orange zest and blend in a food processor or blender until smooth.  Allow to cool.

Dough
   1 stick butter (salted and room temp) - add 1/4 tsp salt if using unsalted butter
   1/2 cup sugar
   1 - 1 1/2 tsp orange zest
   1 egg
   1 tsp vanilla
   1 1/2 - 1 2/3 cups flour

In a stand mixer, cream butter, sugar, and orange zest until light and fluffy, scraping down the sides before moving on to the next step.  Add eggs and vanilla and allow to completely incorporate.  Again, scrape down the sides of the bowl.  Next, add flour and mix on low, just until blended.  You may decide that you like your dough a little more firm, so add the extra bit of flour.  I like creamy, softer dough, so I usually use a little less than most people!  (I don't believe in crunchy/dark cookies!  Only ones that are soft, gooey, and melt in your hands as you're eating them!  Or rather... I skip the second step and just eat the dough!!).

To assemble the cookies...

Preheat the oven to 350.

Flour the surface in which you're going to be rolling out the dough.  Roll out the dough into a rectangle about 12" long and it about a 1/4" of an inch thick.  The dimensions will probably be around 12x24, but the most important thing I found was making sure the the cookie was thick enough, otherwise, the fig filling will start to fall out of the dough as you're wrapping it up!

Next, cut the dough (long ways) into about 4" stripes (12x4).  In the center of these, evenly distribute the filling.  Make sure you give it a decent amount of filling, otherwise the dough will overwhelm the cookie and you won't be able to enjoy the fig part (you might as well be making orange cookies otherwise!).

Fold up both sides of the dough, sealing it with your fingers at the seam.  Place the cookie log onto a baking sheet, seam side down.  You might want to place some parchment paper, wax paper, or foil down on your baking sheet.

Bake for 18-22 minutes (or once cookies look light brown).  Remove from oven and allow to cool for about 10 minutes before cutting into 1" pieces.

Sunday, April 10, 2011

Chocolate Irish Cream Tart

Our awesome friends, Pierce and Lindsey, invited Nicholas and me over for dinner a couple of nights ago.  As always, I wanted to offer anything I could!  Lindsey at first, via text message suggested we bring a "desert" over, in which I responded, "I don't know if we can manage a whole desert... but we'll certainly bring a dessert of some kind!"  (Sorry, Lindsey, just had to add the humor from the text conversation.  :)  Anna and my mother can both vouch that quite often, I miss a number of things as I'm quickly writing a message!).

So... that big bottle of Irish Cream that I got for St. Patrick's Day (when I found out you can buy alcohol at 10:00am in Texas...) has been sitting in the fridge and asking to be used for quite some time now.  'Another dessert,' I thought!  After searching numerous recipes online and finding things that only called for about a teaspoon or so of Irish cream, recipes that really just sounded awful, or called for a couple of ingredients that I didn't have, and since I didn't have the car at my disposal to get those few items, I was feeling "out of luck."  I finally stumbled upon a rather tasty sounding recipe... a chocolate tart!  Looking over the recipe, I found that I have everything (with the small adjustments I always end up making to a recipe to put my own stamp on it!) except for one thing... sweetened condensed milk...

I must be honest.  I have used sweetened condensed milk a number of times, especially when making a few bar cookie recipes that I LOVE.  But has anyone else ever been grossed out when opening that can?  I started looking for "sweetened condensed milk substitutes" in Google and, to my dismay, continually was finding recipes that called for milk powder.  "Well, that's great... lovely..." another thing I didn't have (and didn't want to own anyway).  I finally narrowed my search by adding "with milk" and came across a great site with a homemade recipe that called for, hold your chair, REAL milk!!!  I can't say I looked around after finding this recipe, www.kitchenstewardship.com got me started on the right track.  I adjusted her recipe a little, as I didn't have white sugar (only brown and powdered - can you tell that I'm using EVERYTHING I can?!) and didn't want to wait the 2+ hours she said it can take (and since I didn't quite HAVE those two hours), I sped the process up a little by whisking much more frequently and on a higher temperature, but came out happy in the end with the result.

And thus was born this chocolate tart!  (Inspired and adjusted from the recipe on Better Crocker - wanted a chocolate crust and a white whip cream topping - the opposite of what the recipe called for).

Chocolate Irish Cream Tart
tart dough
   1/2 cup butter (room temp)
   1 cup flour
   1/4 cup cocoa powder
   2 tbs powdered sugar
   1/4 tsp salt

Preheat oven to 400.

Combine dry ingredients together and mix.  Fork butter in until a smooth, firm ball is formed.  This makes a rather unsweet crust, which I thought might be good, since the rest of the dessert was going to be quite sweet.  So if you want to make it a little more "cookie like," then add more sugar to the recipe (about a 1/3 a cup or so, depending on personal taste).

In either a tart pan, spring-form pan, or pie plate, spread dough over the bottom and about 3/4" up the side of the pan, making the crust as even as possible (unless you like a lopsided tart!).  :)

Bake for about 15 minutes.  Remove from oven, and allow to cool while you make the filling.

chocolate Irish cream filling
   1 14 oz can sweetened condensed milk (for the recipe I used, look below)
   1/3 a cup Irish cream (or heavy cream if you don't want the alcohol)
   1 cup semisweet chocolate chips (melted)
   1/4 cup cocoa powder
   2 eggs

Turn oven down to 350.

If you're using a can of sweetened condensed milk, then heat the chocolate chips either in a double-boiler or in the microwave until smooth.  (If using the microwave, you must be very careful, checking it every 15-20 seconds once it begins to melt, otherwise you'll burn the chocolate chips and they'll taste nasty!  I learned my lesson QUITE early on in life with that one...  Whoops!).  Stir in cocoa powder to the melted chocolate chips.  Add the sweetened condensed milk, Irish cream, and stir.  Once the mixture has cooled down, add in the two eggs (make sure you don't add it while it's too hot, as you probably don't want cooked egg chunks inside your tart!).

Pour batter into crust and return to oven for 15-20 more minutes, or until the center is no longer loose.

Allow tart to cool completely, refrigerating once it has cooled, so the whipped cream won't melt on top!  (This should take about two hours or so).

Homemade Sweetened Condensed Milk
   3 cups milk (whole is probably best, but I used 2% as that's what we had)
   1 cup sugar (again, I used brown, but white would be "traditional")
   1/3 cup butter
   2 tsp vanilla

In a sauce pan, combine milk and sugar.  On medium-low (or medium on our stove...), stir mixture so sugar dissolves.  Once the mixture has come to a low boil, turn down heat to low (or simmer if you'd like to wait the full 2+ hours), stirring occasionally so that the milk doesn't burn.  I found a whisk helpful to keep the sugar incorporated.  Make sure you check on the mixture every five minutes or so!

Once the liquid has reduced to about half, check the amount in a measuring cup.  You'll need it to have reduced to about 1 1/2 - 1 3/4 cups.

At this point, remove from the heat, adding butter and vanilla, and stir until butter has dissolved.

When the mixture was still warm, I melted the chocolate chips inside the sweetened condensed milk I had made and allowed it to cool in the fridge for a short while before I finished making the filling.

Once the mixture was cool enough to add eggs to, in a blended, I poured the milk mixture, added the Irish cream, and cocoa powder and mixed until they blended together.  Remove from the blender and mix eggs in until mixed together.  Pour into tart shell as above and bake and cool as directed.

Irish Cream Whipped Cream
   1 cup heavy cream
   1/4 cup powdered sugar
   2 tbs Irish cream

With a hand or stand mixer, combine ingredients, and beat on medium-high to high speed until peaks begin to form.  Don't over beat, unless you want to spread some sweet Irish cream butter on your bread!

Put on cooled tart and place in fridge until served!

To serve, pour a little more Irish cream over the top, serve with raspberries, chocolate shavings, or whatever might sound tasty on top!  (Or really, you don't need to add much more.  It's pretty rich already!).

Wednesday, April 6, 2011

Blood Orange Bars

Blood oranges?  I had been curious FAR too long, and Anna and I had talked about them plenty of times.  Well, I finally got my hands on some and was racking my brain for things to make with them!  Anna and I have a cupcake recipe in mind with them, but I wanted to hold off of that so we could do it together.  I had thought about different dinners, desserts, etc and I kept coming back to the idea of reworking the traditional lemon bar.

A blood orange is beautiful when you cut into it.  It has a nice, deep color that is rather unexpected if you're assuming it's a regular orange.  The striking "tiger-like" strips are captivating.  Picturesque, really.

I must be honest...  It has never been one of my favorite desserts.  My family has a different type of lemon dessert that we call a lemon bar, and we all know what we mean when we say that amongst us Bryant-Tronset individuals, but when speaking with the "general public," I know what a lemon bar is to about 99.99999% of the world's population.

So, here is my first attempt, ever, at making a "traditional" lemon bar-like dessert.  :)  This recipe was adapted from the Joy of Baking lemon bar recipe.


Blood Orange Bars
crust:
   1 cup flour
   1/4 cup powdered sugar
   1/2 cup butter (room temperature)
   zest of one blood orange
   1/4 - 1/2 tsp salt
   1/2 tsp vanilla

filling:
   3/4 cup white sugar
   2 eggs
   1/3 cup blood orange juice (about two oranges)
   zest of one blood orange
   1/2 tsp salt
   1/2 tsp vanilla
   2 tbs flour

Preheat oven to 350.

In a stand mixer, combine the six ingredients for the crust and mix together just until blended.  In a greased 8x8 pan, press dough into bottom of pan and spread smooth.  Bake for approx 20 minutes, or until lightly golden brown.  Remove from oven and place on wire rack while preparing the filling.

In a bowl (or stand mixer), combine sugar and eggs and beat until fluffy.  Add juice, zest, salt, and vanilla and mix.  Lastly, add flour in and mix so there are no clumps of flour.  Pour over warm crust and return to over for about 20-25 minutes more.  Check on the cookies a few times, as you want to remove the pan from the oven once the center is no longer liquidy and can hold shape.  If you over-bake, you might get a rather funny texture...  :)  Remove from oven once again and allow to cool on the wire rack. 

One the bars have come to room temperature, sprinkle lightly with powdered sugar and serve!

What kinds of recipes are you curious about seeing on here?  Leave a comment!  :)

Wednesday, March 30, 2011

Classic White Cake

Classic white cake with white frosting has always been my daddy's favorite.  And seeing as he was visiting me in Texas, and it just happened to be that he was flying in on his birthday, I couldn't pass by the special opportunity.

Growing up, I have fond memories of my mom making the classic Hershey's Chocolate Cake recipe from the back of the cocoa powder container.  It's certainly a recipe that I have gone to many times when making a chocolate cake (even though I love to make my own recipe up quite often!).  Knowing that my daddy loves his white cake, and that chocolate is not quite the same thing, and after looking at numerous white cake recipes and not really finding anything I liked all that well, I decided to go with my creative side again.  What if I substituted the cocoa powder used in the Hershey's recipe with cake flour?  Hmmm!!!  So, once again, scrounging the cupboards, it came to my sad realization that, well... there wasn't really enough oil.  I didn't want to add a lot of density to this recipe, so olive oil was out of the question.  I measured out what measly amount was left.  1/8 of a cup...  Well, that wasn't going to suffice for the 1/2 I needed.  Why not try something new?  So, the recipe that follows below is exactly what I did, and you know what?  I was quite pleased with the cake portion of it!  (I was pleased with the frosting as well, but I have to say that personally, with a white cake, I want a chocolate or other flavored frosting, and with a chocolate cake, I tend to like a white frosting.  I think they provide a nice balance with one another, but as it wasn't my birthday, I decided to go with the options that I knew would make my dad's taste-buds the happiest!).

Classic White Cake
1 3/4 cups flour
3/4 cup cake flour
1 1/2 tsp baking powder
1 1/2 tsp baking soda
1 tsp salt
2 cups sugar
1/8 cup oil
3/8 (or 6 tbs) melted butter
2 eggs
1 cup milk
1 tsp vanilla
1 tsp almond extract1 cup boiling water

Preheat oven to 350.

In a bowl, combine flour, cake flour, baking soda, baking powder, and salt.  Set aside.  In a stand mixer, combine oil, butter, and sugar and mix for about two minutes (or until light and fluffy!).  Add in eggs, milk, vanilla, and almond extracts and mix.  On low, incorporate flour mixture into wet ingredients.  Do not over mix, but allow to be blended.  Add boiling water and slowly mix again just until mixture looks fully incorporated.

Butter and flour two 8" or two 9" cake pans.  Divide batter evenly between the two.  Once oven has preheated, baking for 18-25 minutes or until toothpick comes out clean, but cake is not overdone (mine was done when I checked it at 18 minutes, but your oven may be quite different!).

Allow to cool for about 10 minutes on cooling racks before removing the cakes from the pans.  (If you're not sure how to best remove cakes from cake pans, check out the first cake recipe Anna and I did back in February in "Party Time.")  The cakes should rest at room temperature for about 30 minutes before frosting.

Almond Buttercream Frosting
1/2 cup butter (room temp)
1/4 - 1/3 cup milk
1 - 2 tsp almond extract
2 1/2 - 4 cups powdered sugar

In a stand mixer, beat butter and almond extract (until fluffy).  Slowly alternate milk and powdered sugar until forms nice peaks and holds it's texture well or until desired texture is reached. 

If you're a big frosting person, I would suggest using 3/4 cup butter and making an extra half of the recipe as this was just enough to frost the cake with a nice layer but not an abundant amount of frosting!

If you're a chocolate person, then think about adding some cocoa powder in place of the powdered sugar.

Assemble the cake by placing a layer of frosting in the middle of the cake or be creative.  Do whatever sounds best to you for the middle between the two cake layers.  This cake had a thin layer of the white frosting as well as a layer of raspberry!  Just a few ideas of what can be done with a white cake!

And yes, the egg really is balanced (it isn't balanced against anything and hasn't been photoshopped!)

Saturday, March 19, 2011

Vegan Made Easy


So tonight, in honor of our dear vegan friends, we have given this evening to you!  That's right.  You heard us correctly.  Here are two, count them, TWO recipes for you guys.  Pasta and cupcakes!

This pasta dish is light and filling, but packed full of a lot of flavor!  And guess what "non-vegan-ers," these are SO easy to make "non-vegan" if you choose with a few adjustments.  If you're not interested in this being a vegan recipe, saute-up some chicken with garlic and olive oil or toss some parmesan or feta on top, or even serve this as a side dish!

As for the cupcakes?  Well.... have we not seen a trend lately?  And really, who's going to pass-up a cupcake?  Just pretend these are healthy since they're banana based, minus the frosting.  :)


Sun-Dried Tomato, Red Pepper, and Spinach Farfalle Pasta
1 large onion
1 large red pepper
3/4 cup sun-dried tomatoes
6 oz fresh spinach
3 cloves garlic (chopped)
olive oil
salt
pepper
1 tsp red pepper flakes
tricolore farfalle pasta (8 - 16 oz, depending on pasta/sauce ratio preference)
truffle oil (for drizzling at the end)

Begin to boil water and prepare pasta as directed.  If you'd like, you could substitute another pasta.

Dice onion, red pepper,  and sun-dried tomatoes.  In a large, pre-heated skillet, add about 2 tbs olive oil, garlic, onion, and red pepper, and cook down.  Once vegetables have begun to brown, add in the sun-dried tomatoes and continue to saute (adding the oils from the jar).  If needed, add more olive oil so the vegetables do not become dry or stick to the bottom of the pan.  Season with salt, pepper, and red pepper flakes.  You may decide that you want the dish more or less spicy and add or omit some of the red pepper, however, it adds a nice, subtle zing to the dish.  :)

Once the vegetables have browned evenly, add the fresh spinach in and mix until lightly wilted (about two minutes).

Remove from heat and dish over pasta.  Drizzle with truffle oil, if desired, or more olive oil.


Banana Nut Cupcakes

1 cup white flour
1 cup whole wheat flour
1 1/2 tsp baking powder
3/4 tsp salt
1/2 cup sugar
1/4 cup maple syrup
1/3 cup oil
4 ripe, ripe bananas (mashed)
3/4 cup chopped walnuts (toasted if you'd like)

Preheat oven to 350.

Mix dry ingredients together in a separate bowl and set aside.

Mash bananas well and add to mixing bowl.  Brown bananas are great for baking, since they have such a high sugar content.  Make sure the bananas you use are nice and brown like the ones above!

Add oil, maple syrup, and vanilla to banana mash and mix until well incorporated.  Slowly add the dry ingredients in halves and blend into the wet mix.  Add walnuts last (if desired) and mix.  You may decide to toast the walnuts for a few minutes like we did (since the oven has already been preheated for the cupcakes themselves, but toss the chopped walnuts onto a cookie sheet and toast until lightly browned or desired darkness).  If you don't like nuts, omit them all together.

Bake for 17-18 minutes or until a toothpick comes out clean.  (Look!  Everything in here is vegan!)

Frosting
4 oz cream cheese (substitute)
4 tbs butter (margarine or other substitute)
1 - 2 tsp vanilla
powdered sugar

In a stand mixer or a bowl with a hand mixer, beat cream cheese and butter until smooth.  Add the vanilla and powdered sugar until you reach desired sweetness and/or texture.  If you're not a vegan, then, by all means, use the regular ingredients, but here's a recipe that's easily made with substitutions!

Without the frosting, these are really just muffins... shhhh don't tell anyone!

Thursday, March 10, 2011

Early Irish Fest.: Guinness Cupcakes

Cupcake binge?  Cupcake fling?  Cupcake obsession?  We're not sure...  And we're also not sure how long this is going to last, but who cares, right?  As long as they taste good!  And why not make each kind as different as possible?  We already have a few prospective flavors we had to put on the back-burner tonight (due to some failed missions in getting required ingredients, but we won't go into details.  We'll just leave it at... this part of town is not stocked for our high-end taste buds).

Since we're quickly approaching the time of year when little green men, pots of gold, and rainbows are abundant, we thought we'd give a toast to the Irish and make a recipe with the nation's staple food: some good 'ol fashioned Guinness beer!  Can't say either of us enjoy drinking the beer on its own, but baking with this alcohol is a whole new ballgame!  Partially inspired by our lack of Irish Creme and an awesome friend Lindsey who made a tasty Guinness cake a few months back, here is our tribute to the Irish!

We might just even have to enter ourselves on Cupcake Wars...  :)  Is that allowed?

Guinness Cupcake
1 cup Guinness
3/4 cup butter (room temp)
1 cup flour
1 cup cake flour
3/4 cup cocoa powder
1/2 tsp salt
1 1/2 tsp baking soda
1 1/2 cups dark brown sugar
2 eggs
1 tbs vanilla
2/4 cup sour cream

Preheat the oven to 350.

Combine the flour, cake flour, cocoa powder, salt, and baking soda together and mix.  In a stand mixer, add butter and sugar together and blend until creamed.  Once nice and fluffy, and in the Guinness and mix on low. The texture will look a little funny, but don't be disturbed, that's okay.  Add in the vanilla and eggs and mix.  The batter will still look funny.  :)  Next, mix in the sour cream.  The texture will start to look a little more normal.  Once all incorporated, slowly start to mix in the dry ingredients.  Do not over beat the batter, but make sure all of the dry ingredients are blended in.


Place cupcake liners in the muffin tins and fill about 3/4 of the way (they will look decently full, but shouldn't be spilling over the edge).  This yields about 18 cupcakes.

Bake for 15-16 minutes or until a toothpick comes out with a few crumbs.  You want them to be nice and fluffy looking (no over baking!).  Remove from oven and allow to cool for 5-10 minutes before removing from the pans.


Ganache Filling
1 1/2 cups semi-sweet chocolate chips
1/3 cup  half-n-half (or heavy cream)
2 tbs butter
1 tbs Guinness

In a saucepan, add chocolate chips and butter and allow to melt on medium-low, constantly stirring.  Once mixture is almost fully melted, add in the Guinness and the half-n-half (or heavy cream).  Continue to stir until all of the chocolate is melted and the mixture is nice and smooth.  If you want it a little thicker, add more chocolate or less liquid.

Once the cupcakes have cooled, remove the insides of the cupcakes making about a 3/4" hole about 1" deep. It'll be a little crater.  :)  We used the 1/4 and 1/2 teaspoon measures, since we don't own a cool to do it for us.

Carefully spoon the ganache filling into the holes!  This should be just enough, with a little extra, depending on how deep and wide you make those holes.  We came out with just a little left over.  We didn't want to overdue the ganache and have a chocolate overload on the inside (just a nice, little surprise!).

Cream Cheese Frosting
1/2 cup butter (room temp)
8 oz cream cheese (room temp)
1 tsp vanilla
green food coloring (optional... but FUN!)
powdered sugar (approx 1 - 1 1/2 cups)

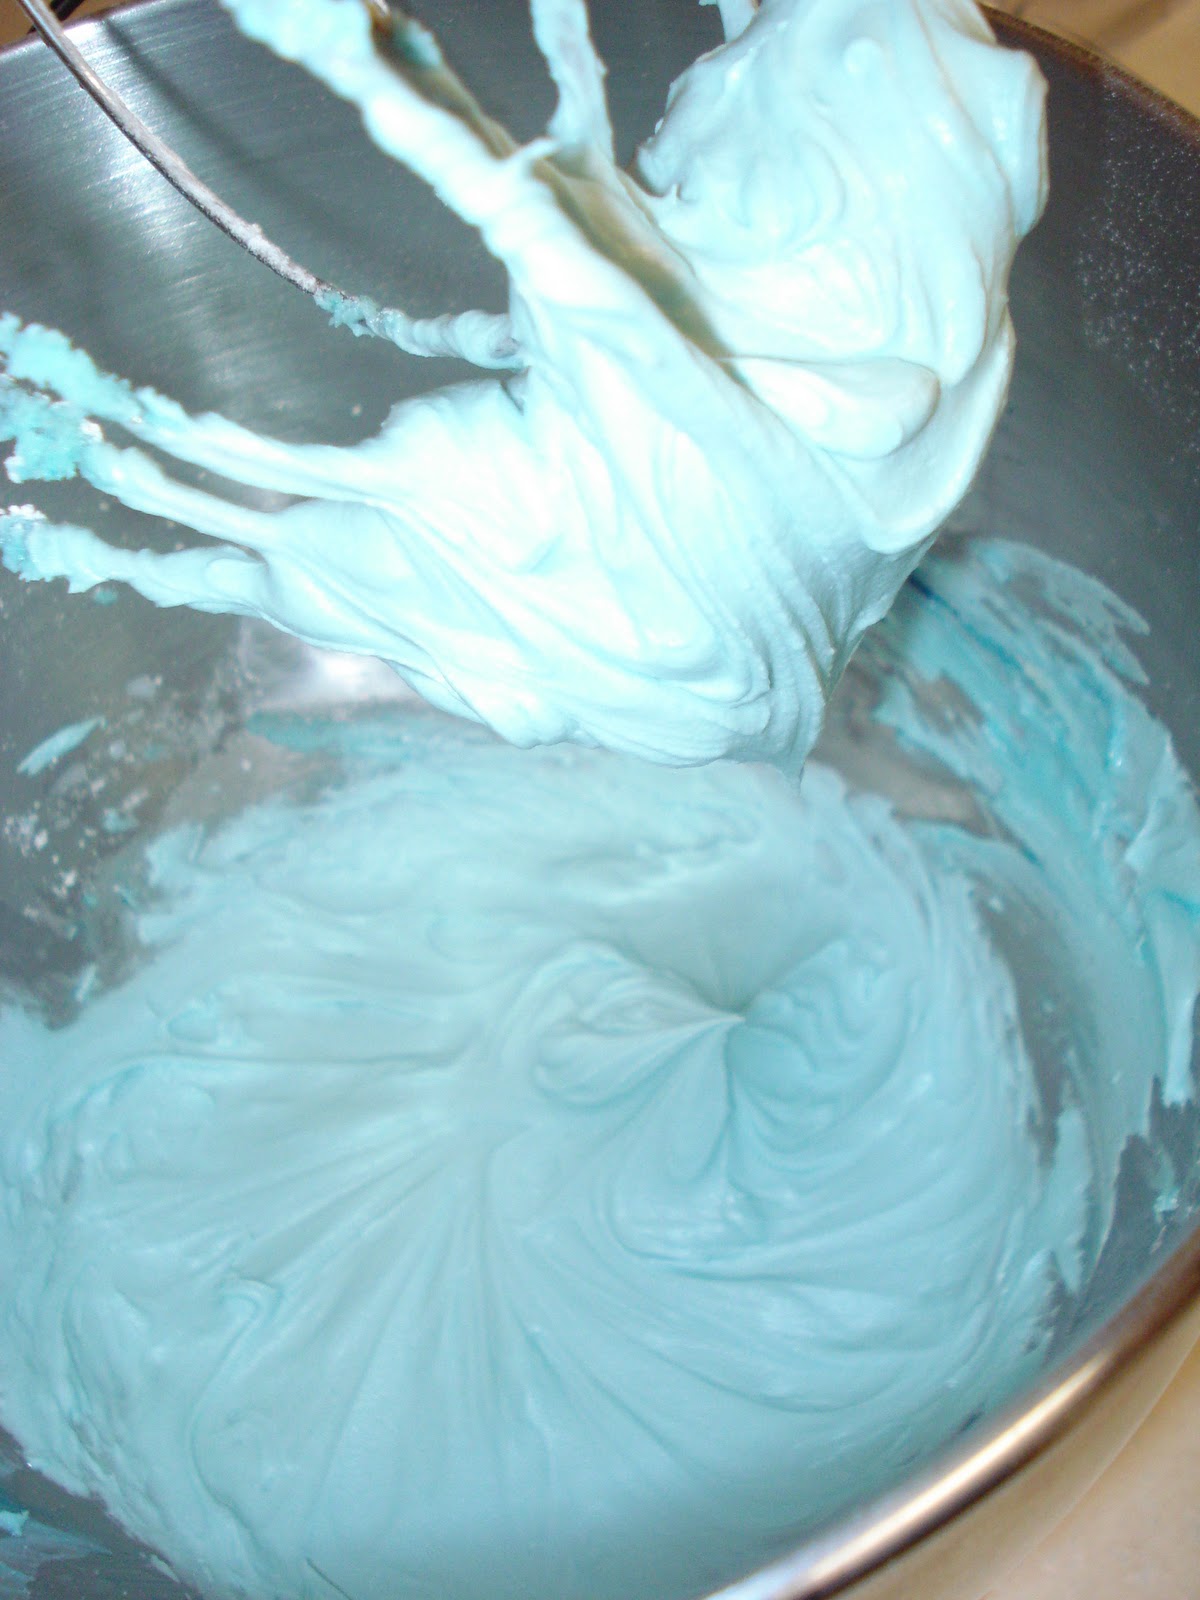
In a stand mixer, cream the butter and cream cheese until smooth.   Add in vanilla and food coloring (if desired).  Mix until blended and slowly add powdered sugar until you reach the desired consistency for your frosting.

Now frost those guys and eat 'em!!!

Tuesday, March 8, 2011

Funfetti!

That's right!  You read it correctly!  Let's be honest here.  Who doesn't have fond childhood memories that include funfetti cake or cupcakes in one form or another?!  And what better a time to celebrate funfetti than with a birthday?!

Nicholas (Alexandra's husband) has a birthday this week and as a pre-celebration for all the folks at school, Nicholas gets to take these homemade cupcakes to school with him.  :)


Funfetti Cupcakes
2 1/4 cup flour (all purpose)
1 1/2 cups sugar
1 tsp baking powder
1 tsp baking soda
1/2 tsp salt
1/8 - 1/4 cup sprinkles
1/2 cup oil (or melted butter)
1 cup milk (or yogurt or buttermilk)
4 egg whites
2 tsp vanilla

Just like the box mix (shhh!!!), mix all of the dry ingredients together (flour, sugar, baking powder and soda, salt, and sprinkles).  We suggest using the long sprinkles (apparently called " rainbow jimmies" in New England, which was unknown to me until reading another blog...) as they "bleed" better into the batter.  Add in the oil or butter, milk, egg whites, and vanilla and mix until well blended, but do not over mix.

Line muffin tins with paper liners or grease with cooking spray or butter.  Evenly destribute batter.  Fill the approximately 1/2 - 2/3 of the way full (or about 3/4's of the way for the mini muffin tins).  This recipe yielded 12 "regular" sized cupcakes and 24 mini cupcakes!  You may decide to make 48+ mini cupcakes or 24 regular ones.

Bake at 350 for 16-18 minutes or until lightly golden (or for mini cupcakes, bake approximately 11-12 minutes).  They should be able to "bounce back" upon a light touch (make sure your finger doesn't sink in, or they need another minute or two).  Times may vary according to your oven.

Let cool for about 10 minutes before removing from baking pans and let cool completely before frosting (unless you'd like melting frosting...).

Buttercream Frosting
1 stick butter (1/2 cup at room temperature)
2 tbs heavy cream (half-n-half, milk, etc)
powdered sugar
1/4 - 1/2 tsp almond extract (if desired!)
food dye (if desired)

Make sure butter is room temperature!  (The texture will not come out the same if you melt it or use a hard stick of butter!)  Put butter into mixer and add dye (if desired) and blend until smooth (and desired color is achieved).  Slowly add powdered sugar, alternating with heavy cream, until a light, fluffy, yet stable, texture is created.  You may decide to alter the color at this point, so have fun!

This recipe was decent for frosting the 12 regular-sized cupcakes and the 24 mini cupcakes the batter yielded.  If you're a big frosting fan, then by all means, double it and INDULGE your sweet tooth!

Frost each cupcake and add some sprinkles for a final touch.  :)

Happy Birthday, Nicholas! (part 1)